Pixel Mapper
The Pixel Map tab maps video to DMX-controlled lighting by outputting Art-Net or Streaming ACN (sACN). Each fixture samples colour from a video source and transmits it as DMX channels.
You define fixtures—rectangular sampling regions on the output—subdivided by a grid of sample points. The order of those points determines how DMX channels are addressed.
To open the Pixel Mapper, go to the Map tab along the bottom of the UI, then select Pixel Map from the tabs at the top of the mapping page.
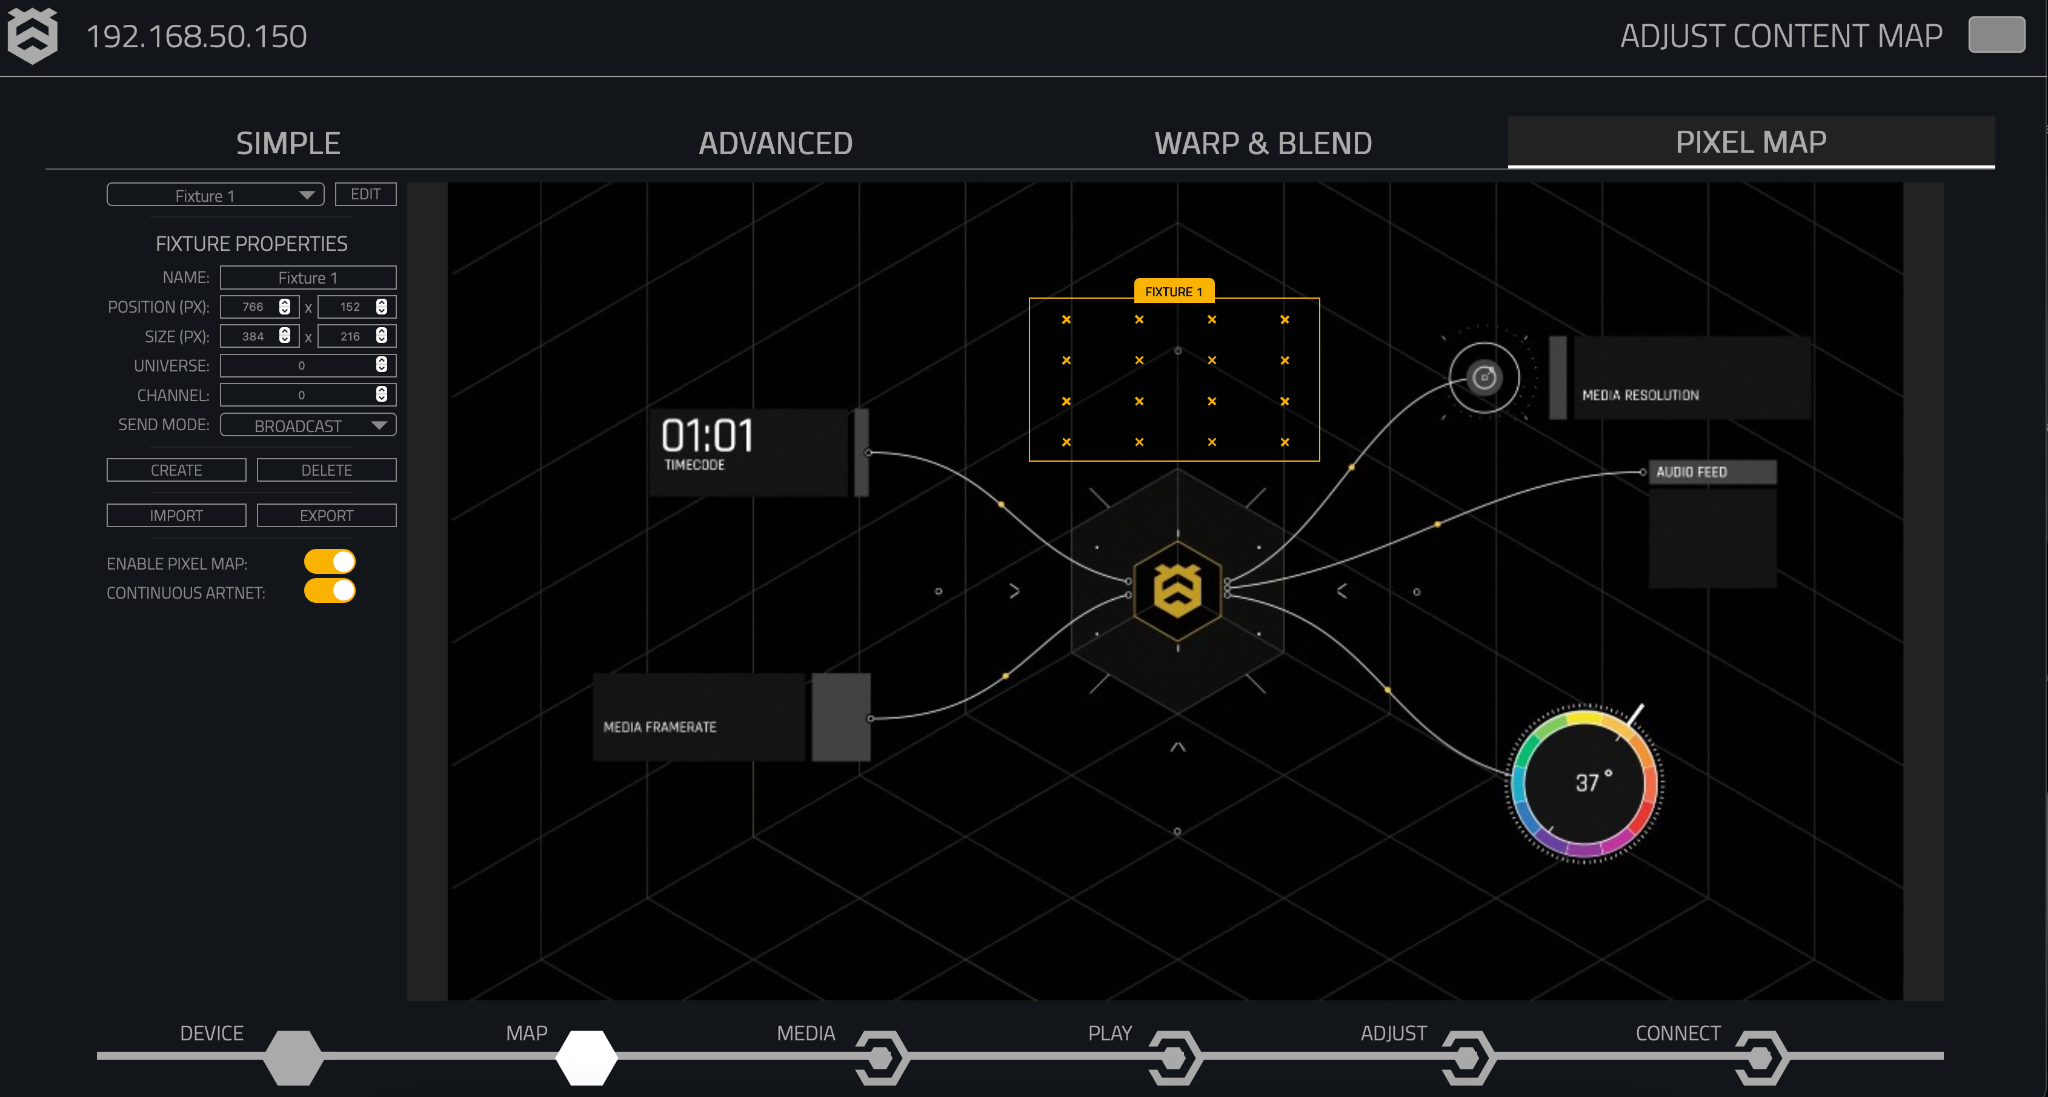
Regions can be selected directly in the main window by clicking on them. The selected region is highlighted in yellow; unselected regions appear grey. You can also click and drag a selected region to reposition it.
Global Controls
| Control | Description |
|---|---|
| Enable Pixel Map | Turns pixel mapping on or off. Disable when not in use for a small performance gain. |
| Continuous Output | Sends DMX data every frame. When off, data is sent only when sampled values change. |
| Channel Usage Gauge | Progress bar showing how many DMX channels are in use. Turns red if the limit for your device is exceeded. |
| Stage | Opens physical unit placement for working in metres or feet rather than pixels. |
| Import / Export | Save the full pixel map to a file, or load a previously saved configuration. |
Creating Fixtures
On the main Pixel Map page, press Create to open the fixture creation interface. Here you can define a new fixture and its properties.
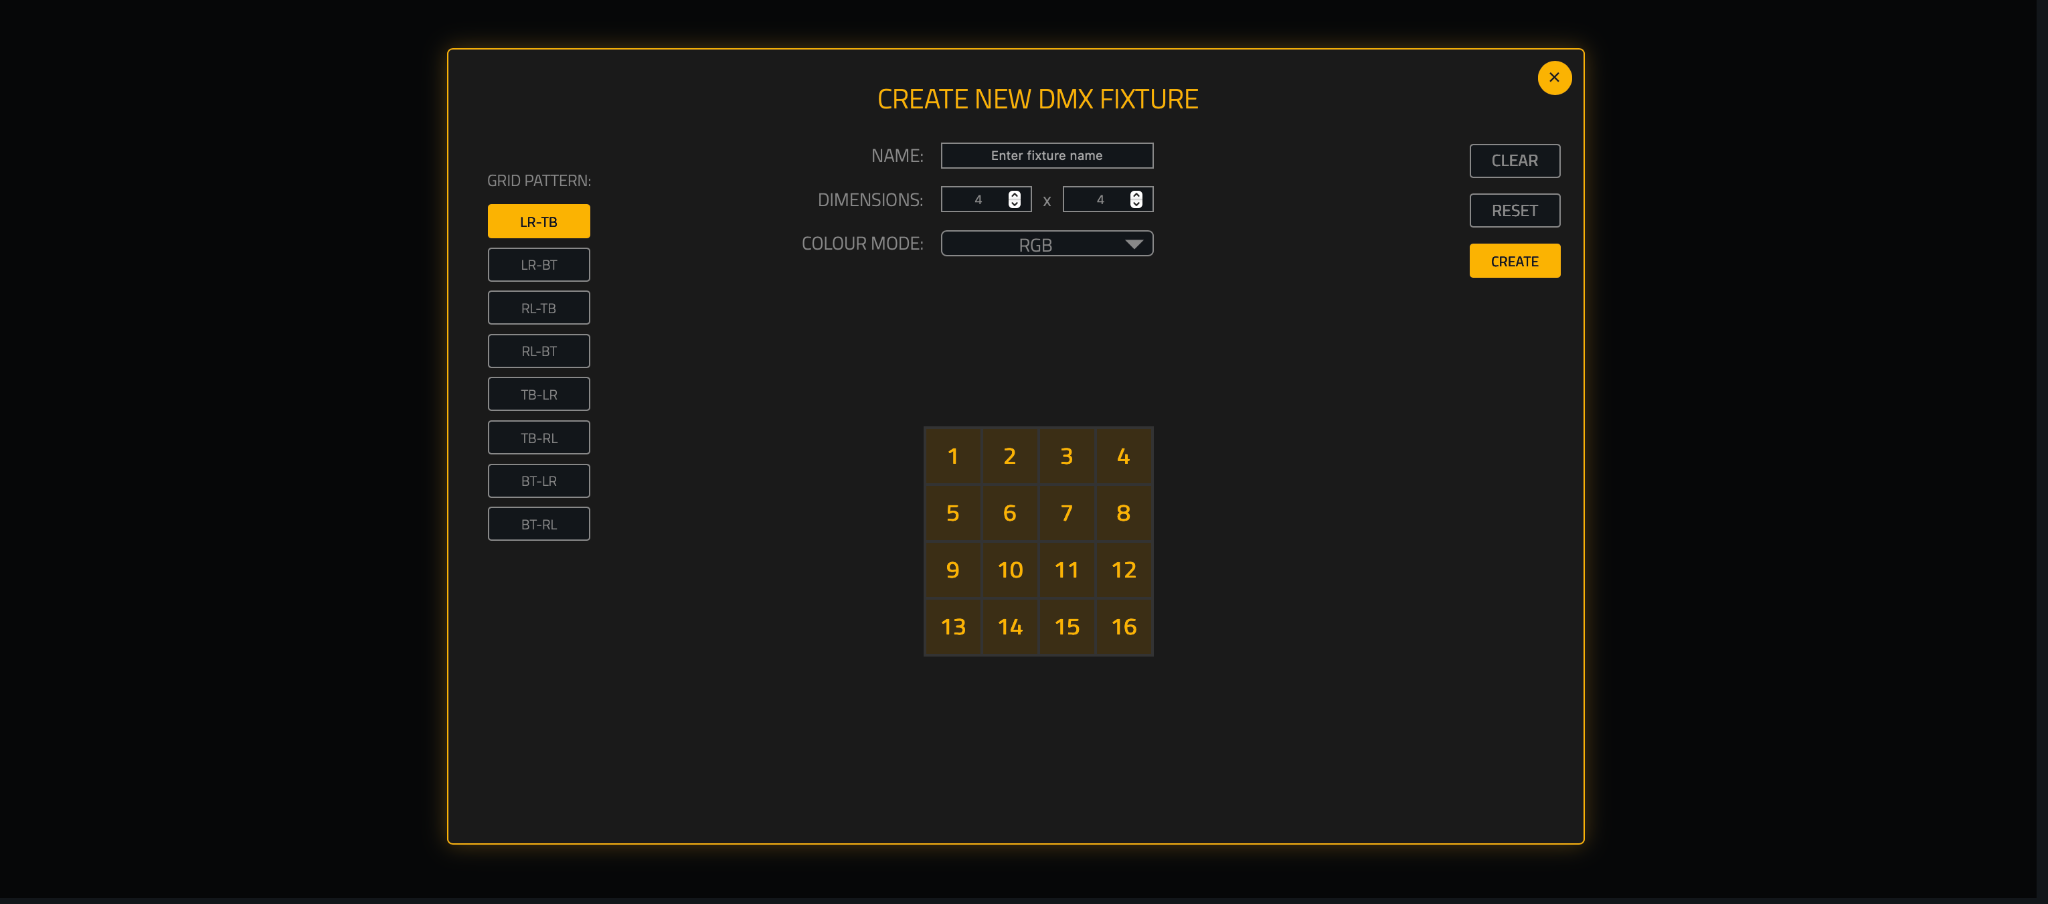
| Property | Description |
|---|---|
| Name | An identifier for the fixture. |
| Dimensions | The size of the pixel grid in cells (width × height). |
| Colour Mode | How each pixel is encoded as DMX channels (see Colour Modes). |
Below these properties is a grid. Click cells to select or deselect individual points. Each active cell receives a wiring number that defines its physical output order on the fixture. If you need an irregular layout, define a larger grid and enable only the cells that match your physical pattern.
Grid Patterns
On the left-hand side, Grid Pattern helpers automate cell ordering:
| Pattern | Direction |
|---|---|
| LR-TB | Left to right, top to bottom |
| LR-BT | Left to right, bottom to top |
| RL-TB | Right to left, top to bottom |
| RL-BT | Right to left, bottom to top |
| TB-LR | Top to bottom, left to right |
| TB-RL | Top to bottom, right to left |
| BT-LR | Bottom to top, left to right |
| BT-RL | Bottom to top, right to left |
On the right-hand side you will find:
- Clear — removes the current grid selection.
- Reset — restores the grid to the selected pattern.
- Create — saves the fixture and inserts it into the pixel map.
Pressing the X closes the interface without saving the fixture.
Editing Fixtures
Editing a fixture uses the same interface as creating one and works in the same way.
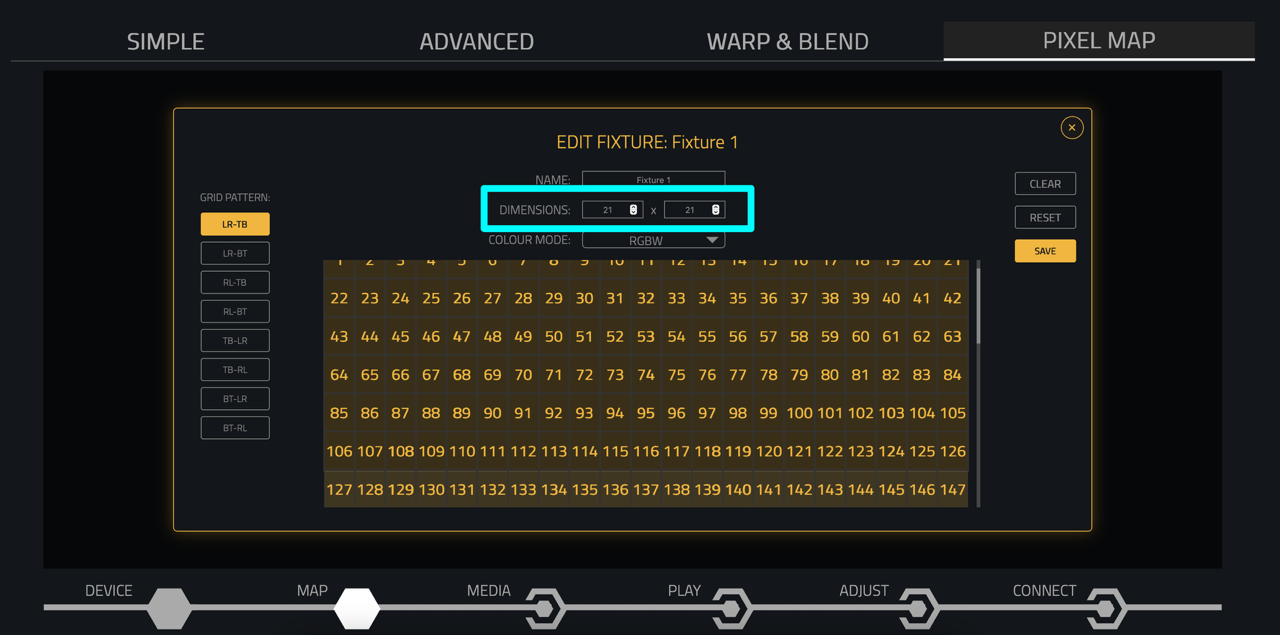
To keep your changes, press Save. Pressing X closes the interface without saving.
Fixture Properties
Once a fixture has been created, you can edit its properties from the controls panel on the left-hand side.
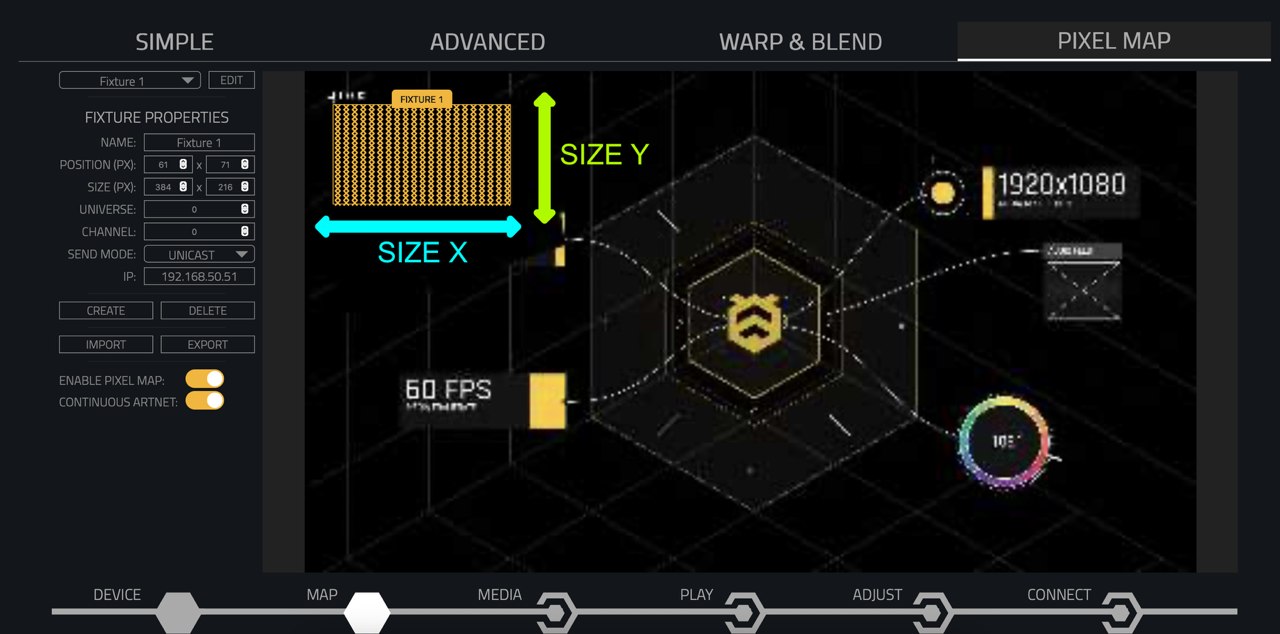
The first control is a dropdown listing all fixtures. You can also select a fixture by clicking it in the main UI.
| Property | Description |
|---|---|
| Name | The identifier given to the fixture when it was created. |
| Position (PX) | The pixel position of the top-left corner of the fixture. |
| Size (PX) | The pixel size of the fixture region. This defines the rectangular sample area over the video output. |
| Universe | The starting DMX universe for this fixture. |
| Channel | The first DMX channel on that universe. |
| Send Mode | How universe data is delivered (see Send Modes). |
| IP | When Unicast is selected, the destination IP address for Art-Net data. |
Further down the controls panel:
- Create — opens the fixture creation interface.
- Delete — removes the selected fixture (you will be prompted to confirm).
- Import / Export — save the pixel map to a file, or load a previously saved pixel map.
Fixture positions and sizes are stored as normalised values internally, so fixtures scale correctly when the canvas resolution changes.
Source Selection
Each fixture can sample colour from a different video source:
| Source | Description |
|---|---|
| Final Output | The composited output after all layers and effects. |
| Layer | A specific media layer texture. |
| Mix | A specific mix texture. |
The available layers and mixes are populated from your current media setup.
Sampling
When viewing the pixel map on the main page, each fixture is shown with a box around it. That box is defined by the Position and Size properties.
Inside the box, markers show where each point samples colour data from the chosen source. The markers are determined by the grid defined when the fixture was created or edited.
Sample points are distributed evenly across the width of the fixture: size X / dimensions X.
Sampling Modes
| Mode | Appearance | Description |
|---|---|---|
| Point | × mark at cell centre | Samples a single pixel at the centre of each cell. |
| Area | Hatched cell box | Averages colour across the full cell area using smooth filtering. Better for larger cells or when you want softer sampling. |
Colour Modes
Each active cell in the grid consumes one or more DMX channels depending on the colour mode:
| Mode | Channels | Description |
|---|---|---|
| RGB | 3 | Red, green, and blue as 8-bit values. |
| RGBW | 4 | Subtractive white — a white channel is derived from the RGB values, with RGB reduced accordingly. |
| RGBWA | 4 | Additive white — full RGB plus a separate luminance-based white channel. |
| Intensity | 1 | Single channel based on ITU-R BT.601 luminance. |
Send Modes
| Mode | Description |
|---|---|
| Broadcast | Sends Art-Net to all devices on the network (255.255.255.255). |
| Unicast | Sends Art-Net to a specific IP address configured in the IP field. |
| sACN | Sends Streaming ACN (E1.31) via multicast. Each universe is sent to a multicast address derived from the universe number. sACN priority can be configured (0–200; higher priority wins when multiple sources target the same universe). |
In multi-surface fixtures, child surfaces inherit the send mode, unicast destination, and sACN priority from the parent.
Addressing
Each DMX universe holds 512 channels. The pixel mapper outputs 8-bit values per channel.
For each fixture, addressing starts at the chosen Universe and Channel, then fills channels sequentially from the wiring grid with no gaps. When a pixel would exceed the capacity of a universe, addressing wraps to the next universe. Wrapping applies to a whole cell, not individual colour channels — if an RGBW cell needs 4 channels but only 3 remain, the entire cell moves to the next universe starting at channel 1.
Example: 2×2 RGBW fixture
If a fixture starts on Universe 1, Channel 1:
| Channel 1 — R | Channel 2 — G | Channel 3 — B | Channel 4 — W |
|---|---|---|---|
| Channel 5 — R | Channel 6 — G | Channel 7 — B | Channel 8 — W |
| Channel 9 — R | Channel 10 — G | Channel 11 — B | Channel 12 — W |
| Channel 13 — R | Channel 14 — G | Channel 15 — B | Channel 16 — W |
Multi-Surface Fixtures
Multi-surface fixtures model devices with multiple emitters in one rectangular region — for example, a fixture with both a soft pixel grid and separate hard beams.
- The parent fixture holds the shared layout and send settings.
- Child surfaces have their own pixel grid, colour mode, and sampling mode.
- Children inherit position, size, and send mode from the parent.
- DMX addressing continues sequentially from where the parent left off.
Multi-surface fixtures can also be used when a single fixture spans multiple universes with addressing gaps, by splitting it into separate surfaces.
Stage Mode
By default, fixtures are placed in pixel space on the output canvas. Stage mode lets you work in physical units instead.
| Setting | Description |
|---|---|
| Enabled | Toggle between pixel and physical placement. |
| Width / Height | Stage dimensions in the chosen unit. |
| Unit | Metres (m) or feet (ft). |
Fixtures can have physical position and size fields when stage mode is enabled. Sampling remains normalised internally — switching between pixel and stage mode does not change the DMX output.
Fixture Library
Fixtures can be saved to and loaded from the library without rebuilding from scratch. Use Import and Export to back up or restore your full pixel map configuration.
Channel Limits
Each Hive device has a maximum number of DMX channels it can output. The channel usage gauge in the UI shows how many channels are in use and turns red when the limit is exceeded. Additional sample points beyond the limit are not processed.
| Product | Universes | Channels |
|---|---|---|
| MINIMA | 25 | 12,800 |
| OSMIA | 50 | 25,600 |
| PLUTO | 100 | 51,200 |
| NEXUS | 200 | 102,400 |