Advanced Mapping
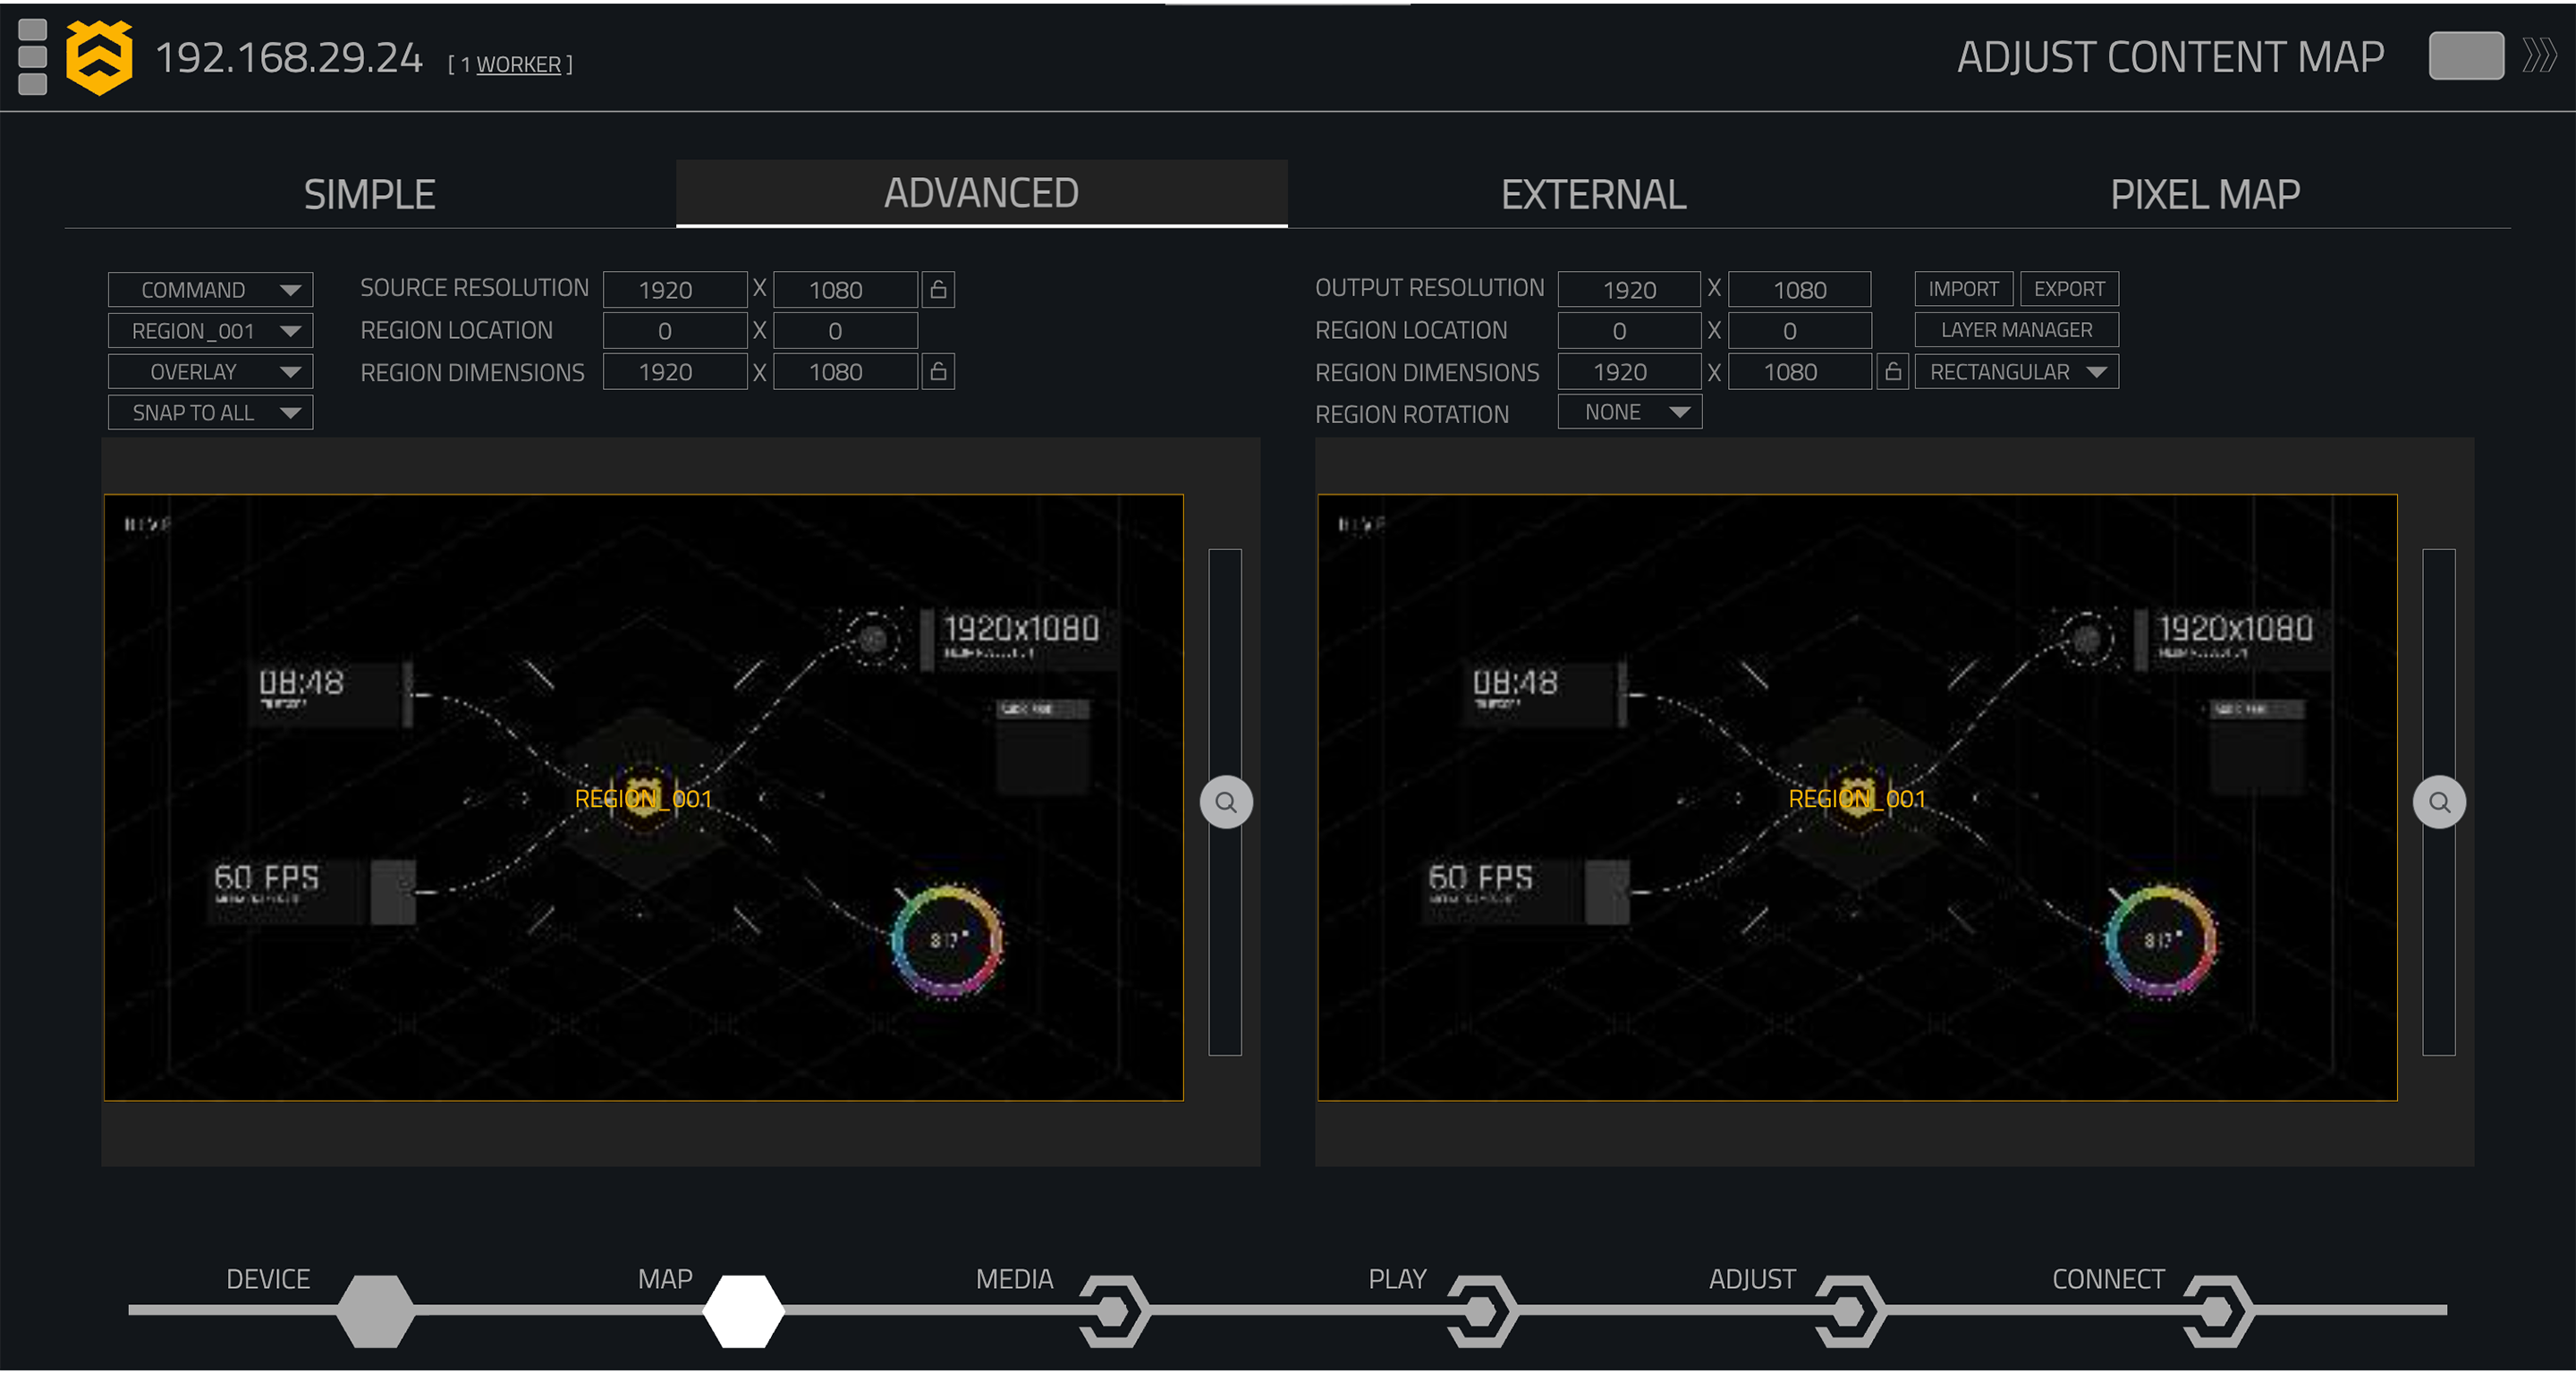
The Advanced Mapping Tab provides precise control over how content is taken from the source and mapped to the Player's video output.
The Advanced Mapping workspace is divided into two main areas:
- Source Region — defines the area of the source content used by the Region.
- Output Region — defines where and how that Region is displayed on the video output.
Multiple Regions can be created, allowing different areas of the source to be positioned and configured independently.
Regions
A Region links an area of the source content to an area of the video output.
The Source Region is displayed on the left side of the Advanced Mapping workspace, while the corresponding Output Region is displayed on the right.
Each Region can be selected and configured independently.
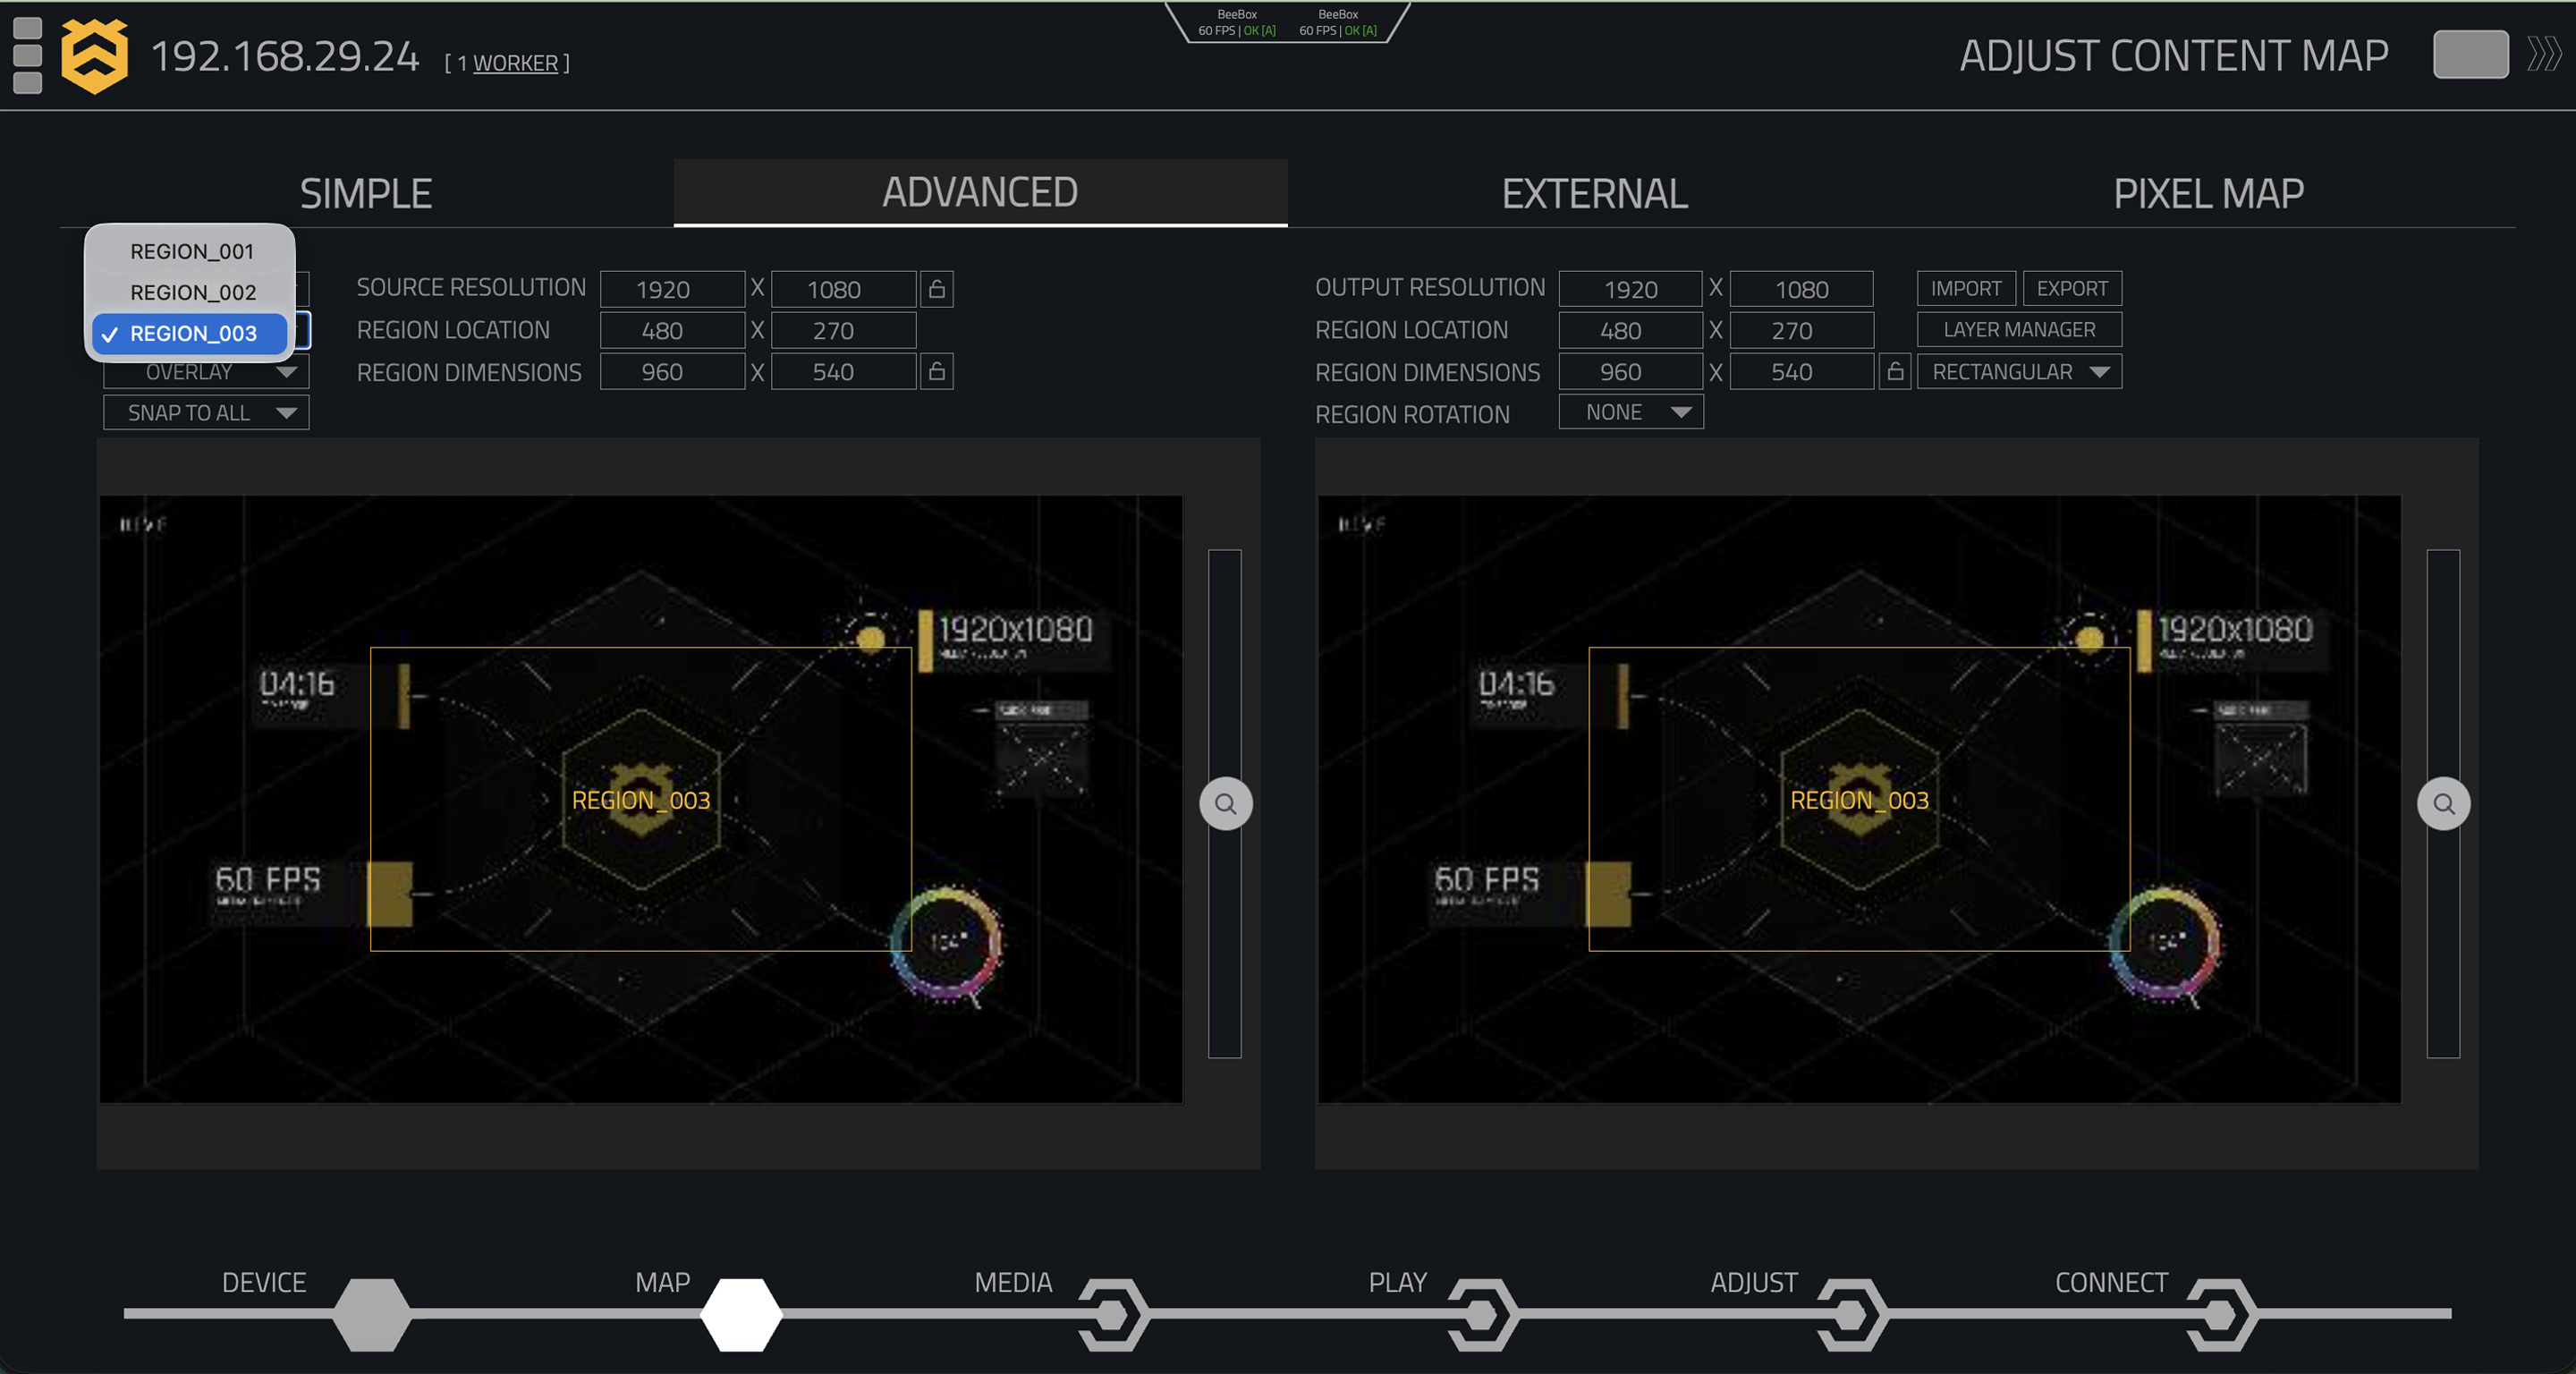
Selecting a Region
The Region dropdown in the top-left of the Advanced Mapping page displays the currently selected Region, for example:
REGION_001
When multiple Regions have been created, use this dropdown to select the Region you want to edit.
Changes made to the Source and Output controls apply to the currently selected Region.
Source Region
The Source Region determines which area of the source content is used by the selected Region.
The following controls are available:
| Control | Description |
|---|---|
| Source Resolution | Displays the resolution of the source canvas. |
| Region Location | Sets the X and Y position of the Region within the source. |
| Region Dimensions | Sets the width and height of the Source Region. |
| Lock | Prevents the associated value from being changed. |
The Source Region can also be repositioned and resized visually within the preview.
Output Region
The Output Region determines where the selected Source Region is displayed within the Player's video output.
The following controls are available:
| Control | Description |
|---|---|
| Output Resolution | Displays the resolution of the Player's video output. |
| Region Location | Sets the X and Y position of the Region on the output. |
| Region Dimensions | Sets the width and height of the Output Region. |
| Region Rotation | Controls the rotation of the selected Region. |
| Lock | Prevents the associated value from being changed. |
| Region Type | Selects the mapping type used by the Output Region. |
Changes are shown within the Output Region preview and applied to the Player's output in real time.
Locking Values
Lock controls are available alongside supported fields in Advanced Mapping.
Enabling a lock prevents the associated value from being changed. This is useful once a resolution or Region dimension has been configured and you want to prevent it from being adjusted accidentally.
Unlock the field to allow the value to be edited again.

Lock values once they have been configured to help prevent accidental changes while working elsewhere in the mapping.
Zoom
The Source and Output previews each include an independent Zoom control.
Use the vertical Zoom control beside either preview to increase or decrease the scale of the mapping workspace. This allows smaller Regions and mapping details to be viewed and adjusted more precisely.
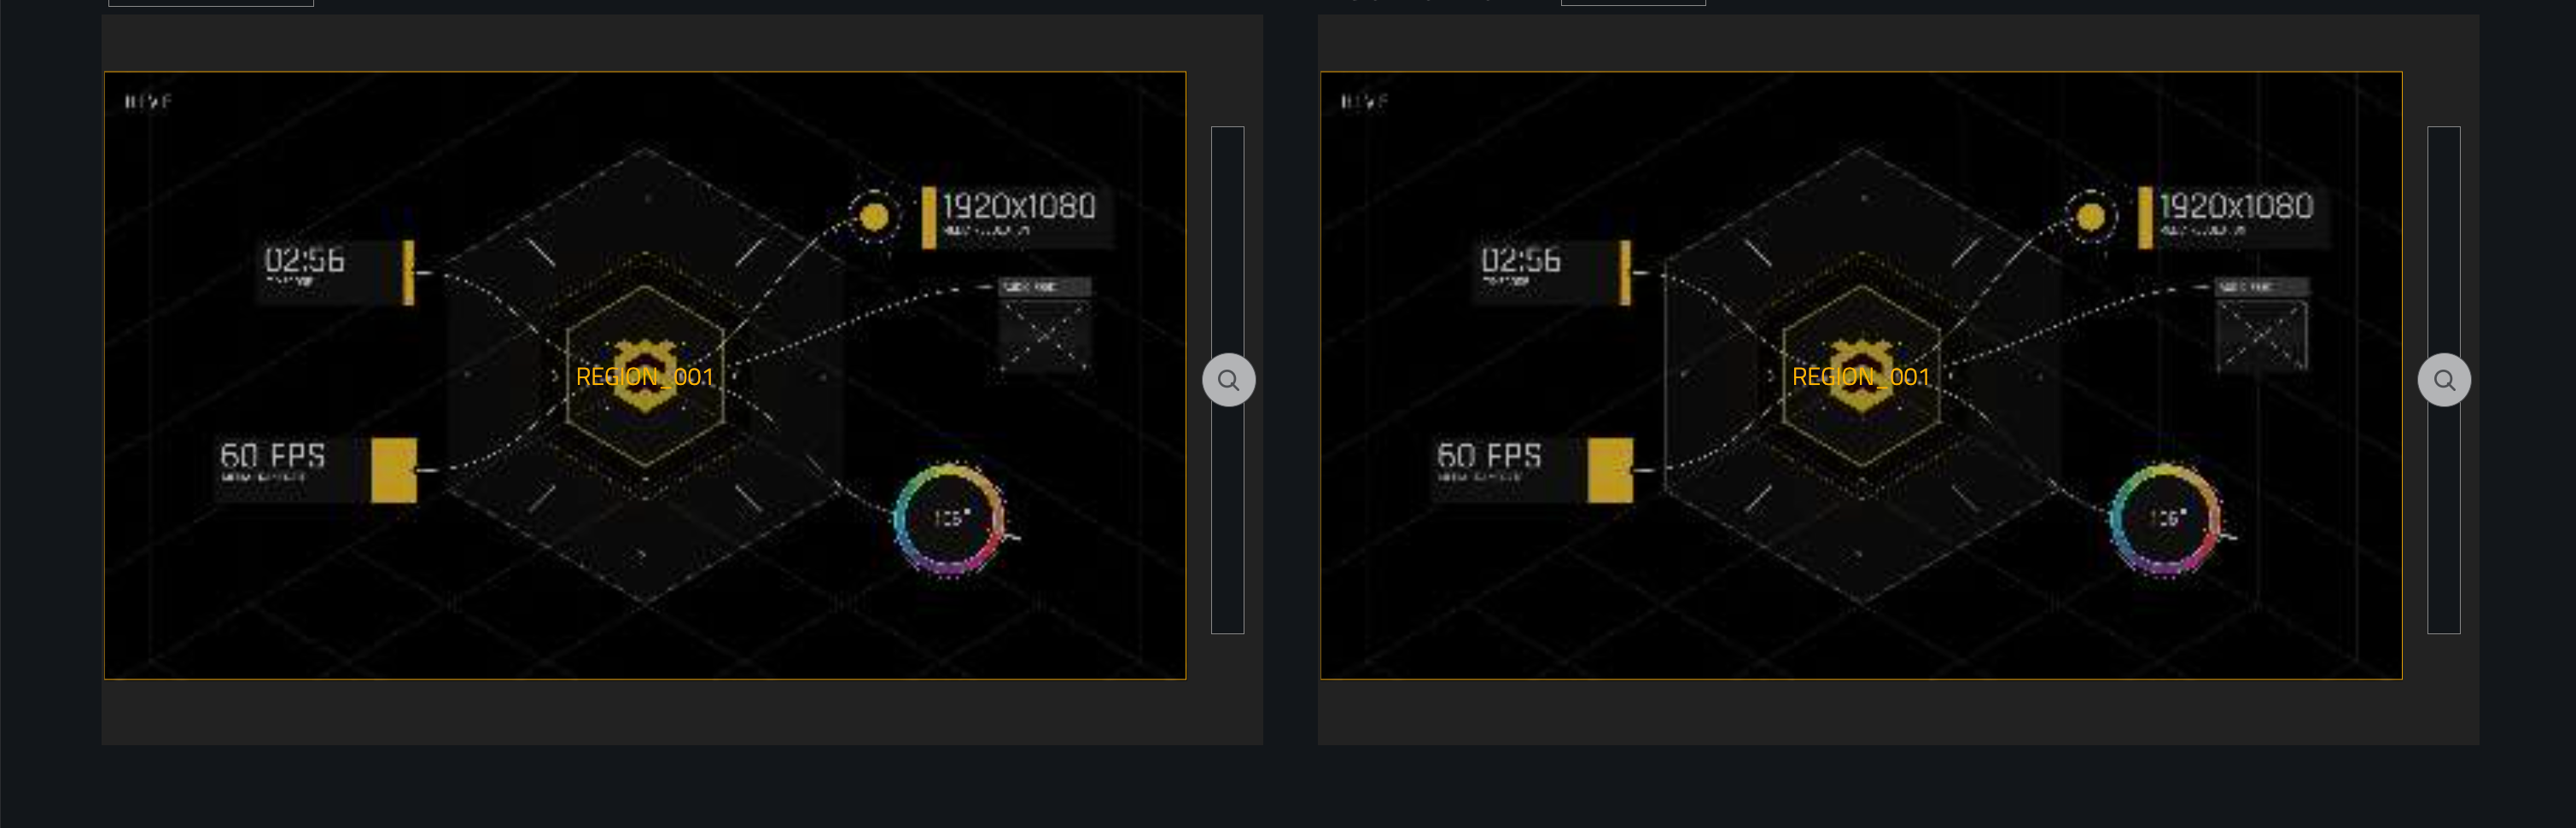
Zooming the workspace does not change the dimensions of the Region or the Player's video output.
Snapping
Advanced Mapping includes snapping controls to help position and align Regions accurately.
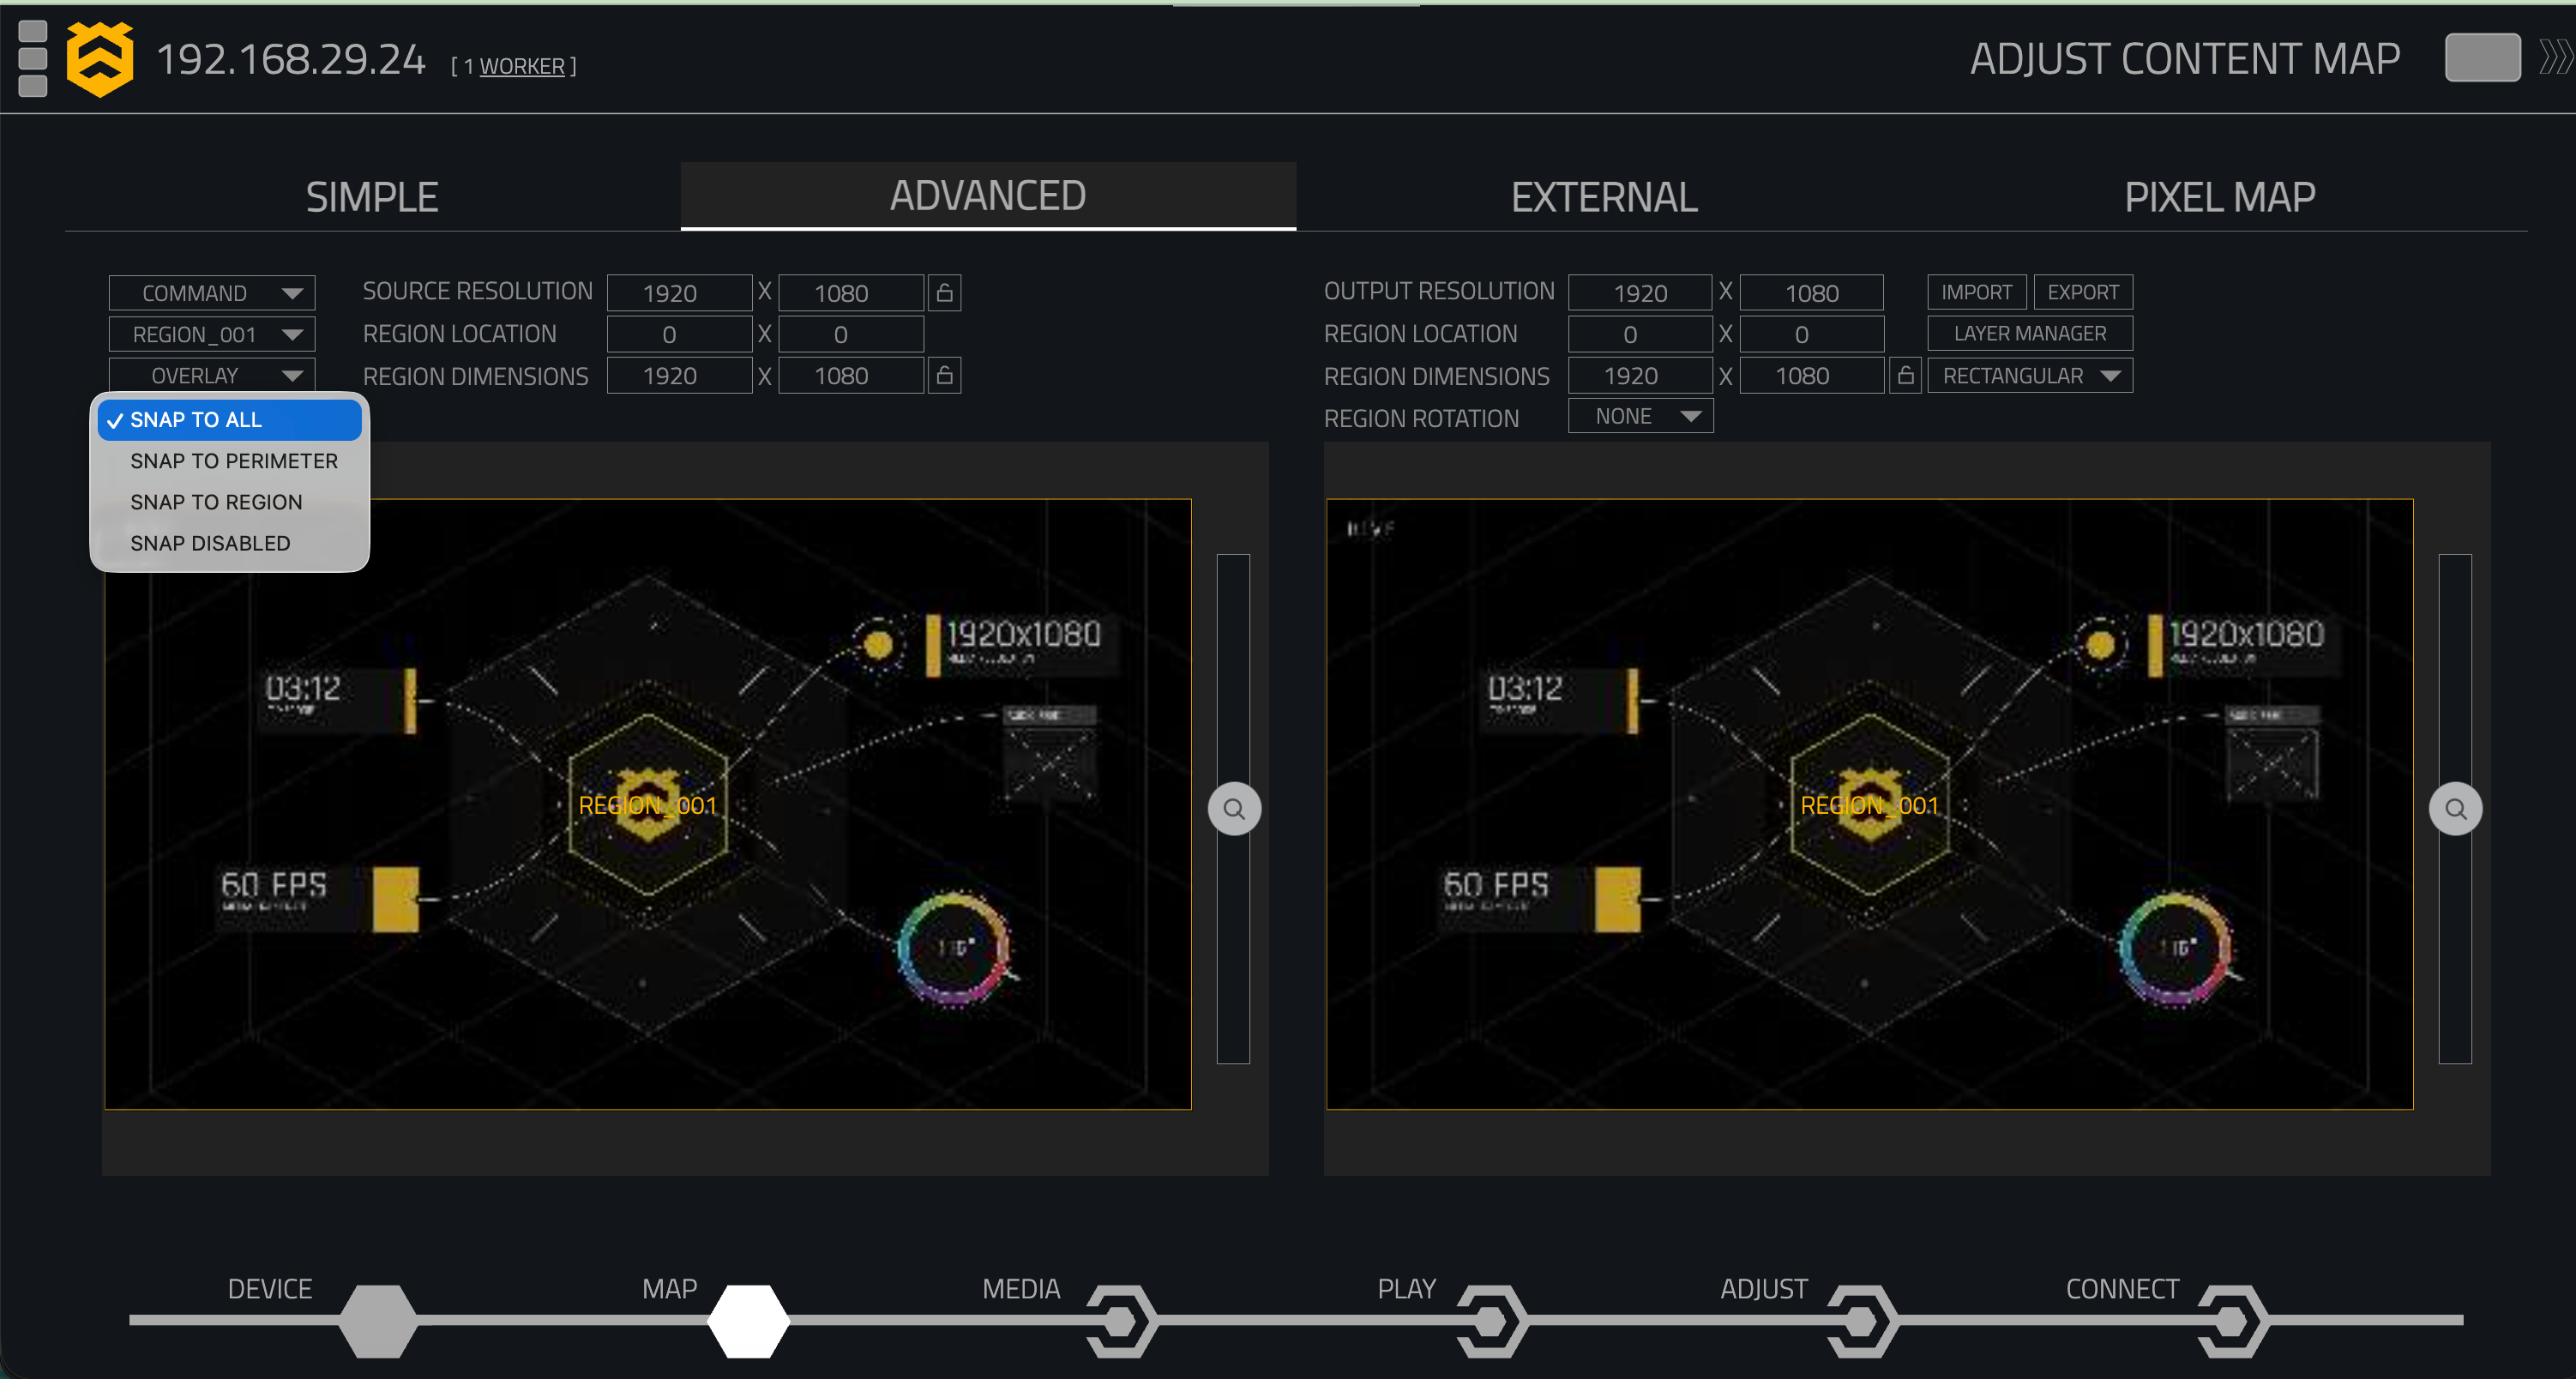
The following snapping modes are available:
| Mode | Description |
|---|---|
| Snap to All | Enables all available snapping behaviours. |
| Snap to Perimeter | Snaps Regions to the perimeter of the mapping area. |
| Snap to Region | Snaps Regions to other Regions, making it easier to position Regions directly next to each other or align their centres. |
| Snap Disabled | Disables snapping. |
Snapping is useful when building layouts with multiple Regions, allowing Regions to be positioned accurately without manually entering matching coordinates.
Use Snap to Region when building layouts with adjacent Regions to quickly align their edges or centre points.
Region Types
The Region Type dropdown determines how the selected Region is mapped to the output.
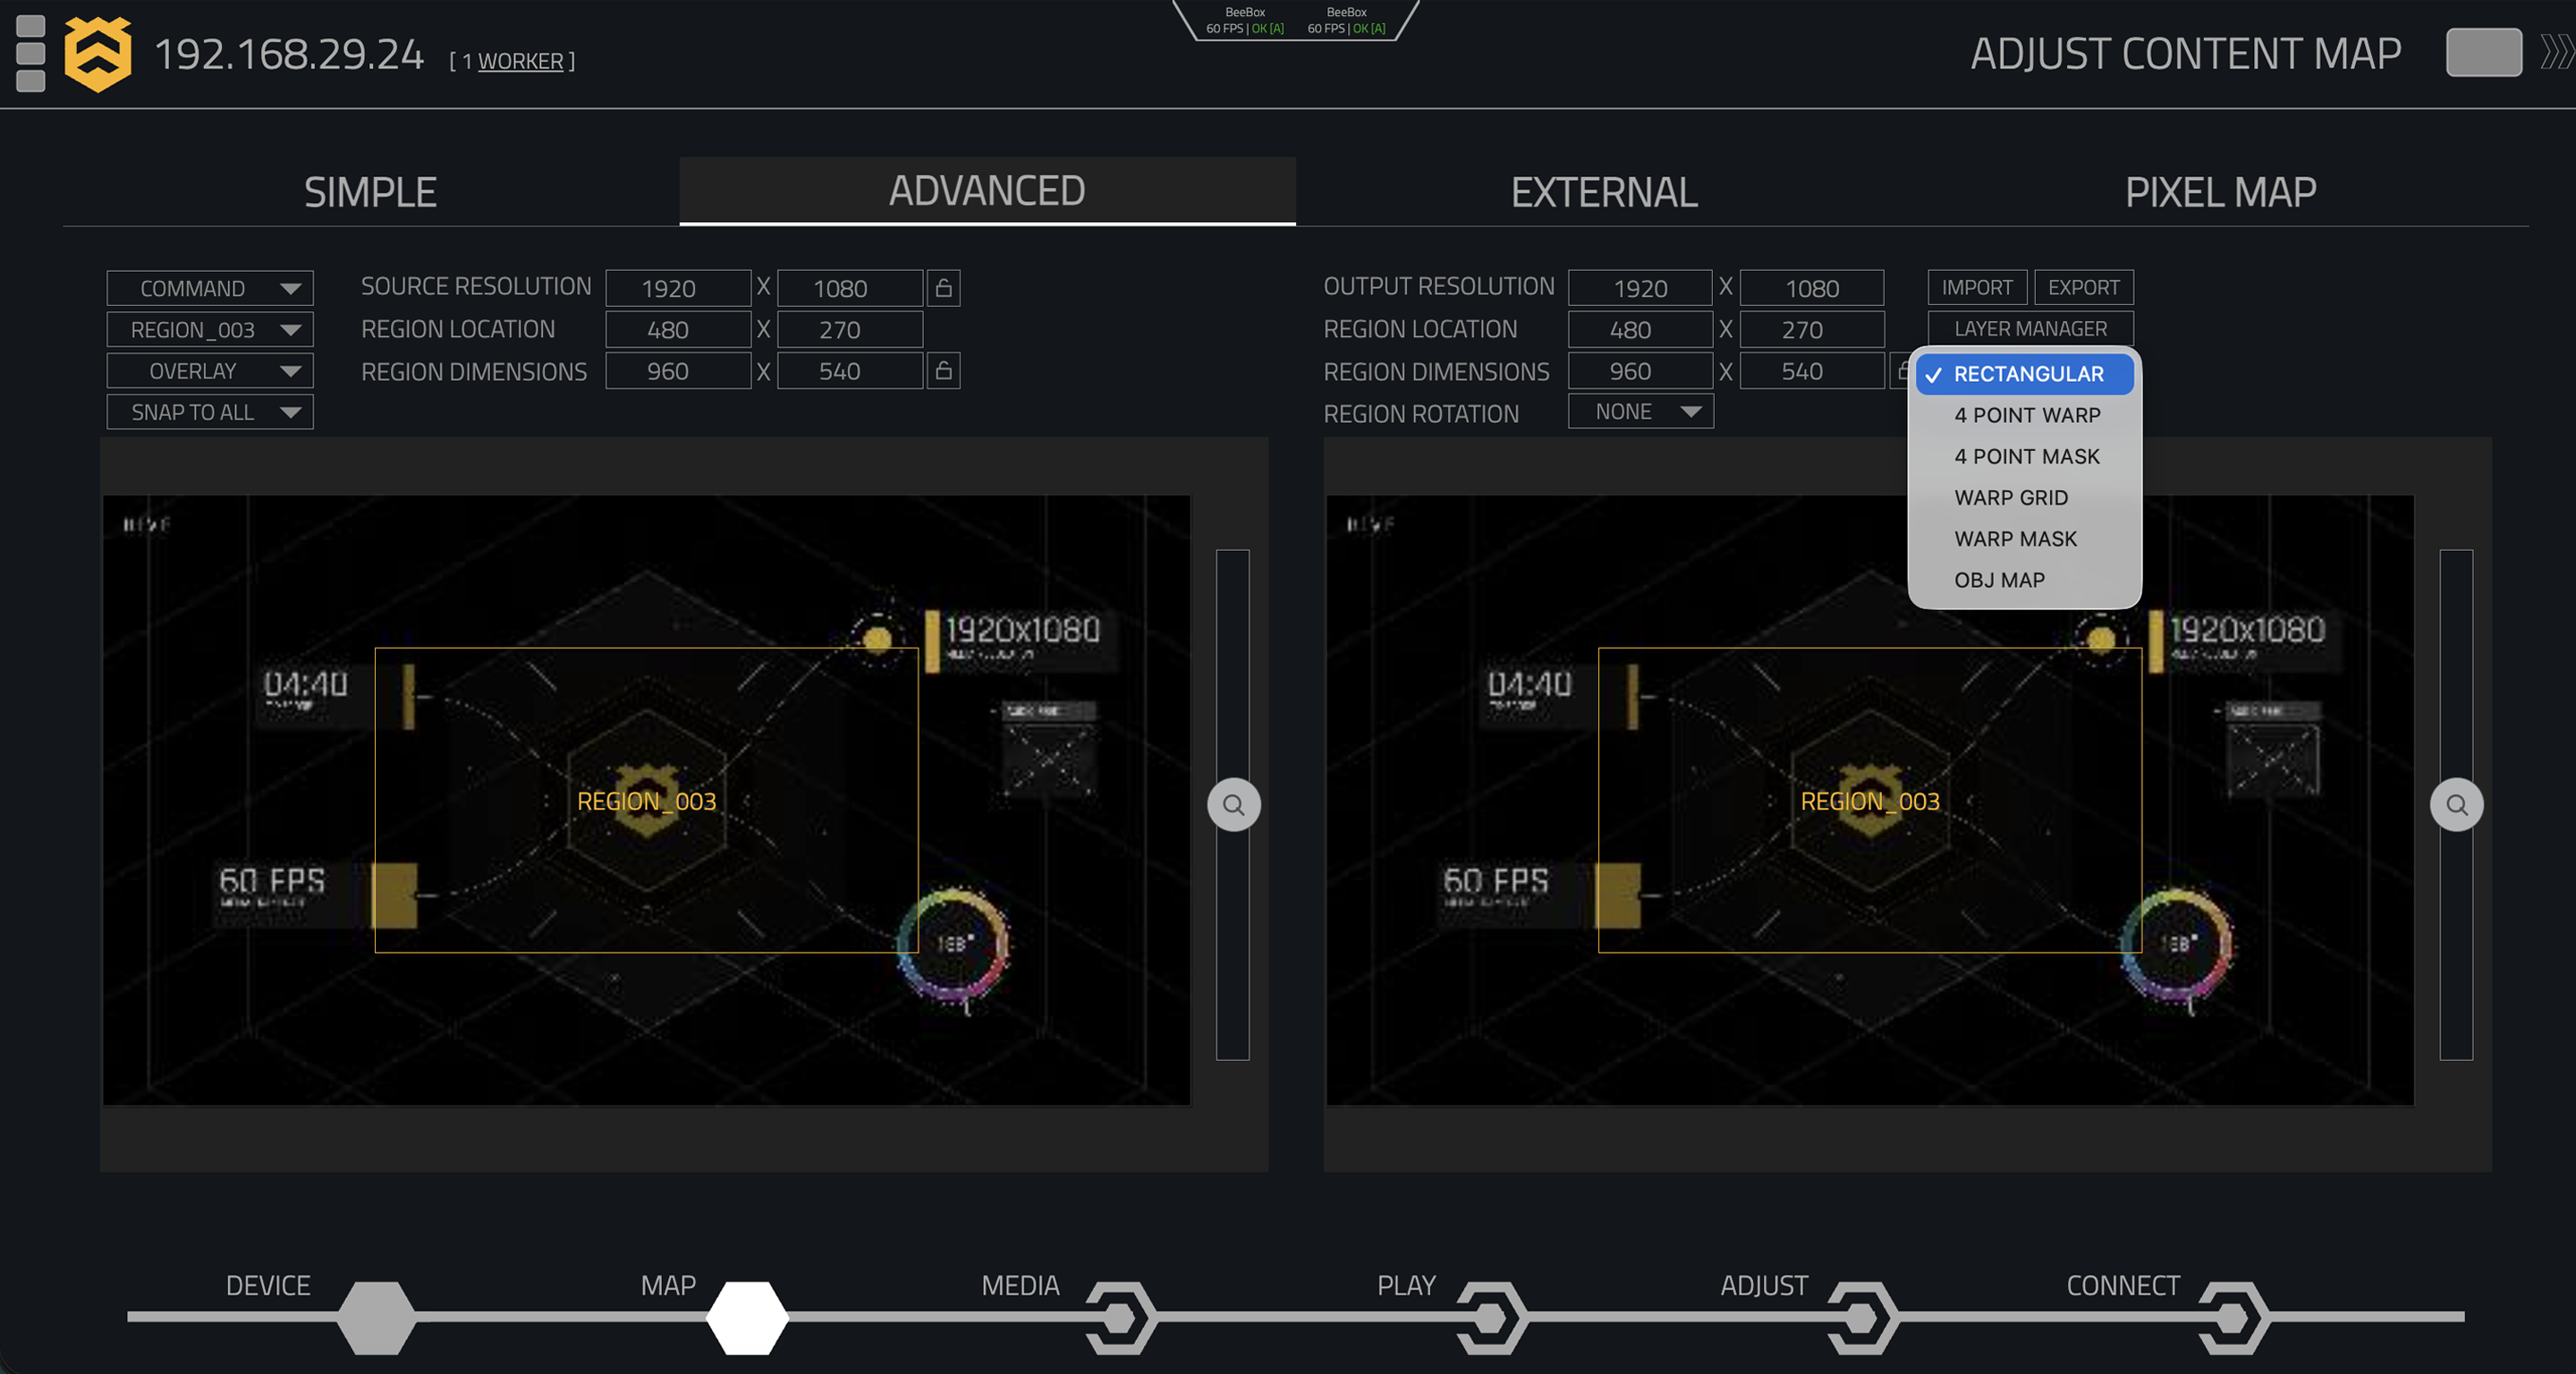
The available Region types include:
Rectangular Region
Creates a rectangular Region that can be resized and repositioned.
4-Point Warp
Creates a four-point Region with independently adjustable corners, allowing perspective correction and distortion.
4-Point Mask
Provides a four-point mask that can be adjusted to control the visible area of the Region.
Warp Grid
Provides a grid of adjustable points for detailed manual projection mapping.
Warp Mask
Provides masking controls alongside the Warp Grid workflow.
OBJ Map
Provides mapping using an OBJ-based geometry workflow.
Learn more about warp grids here.
Blending Options
The Blend Mode determines how the selected Region is composited with other Regions.
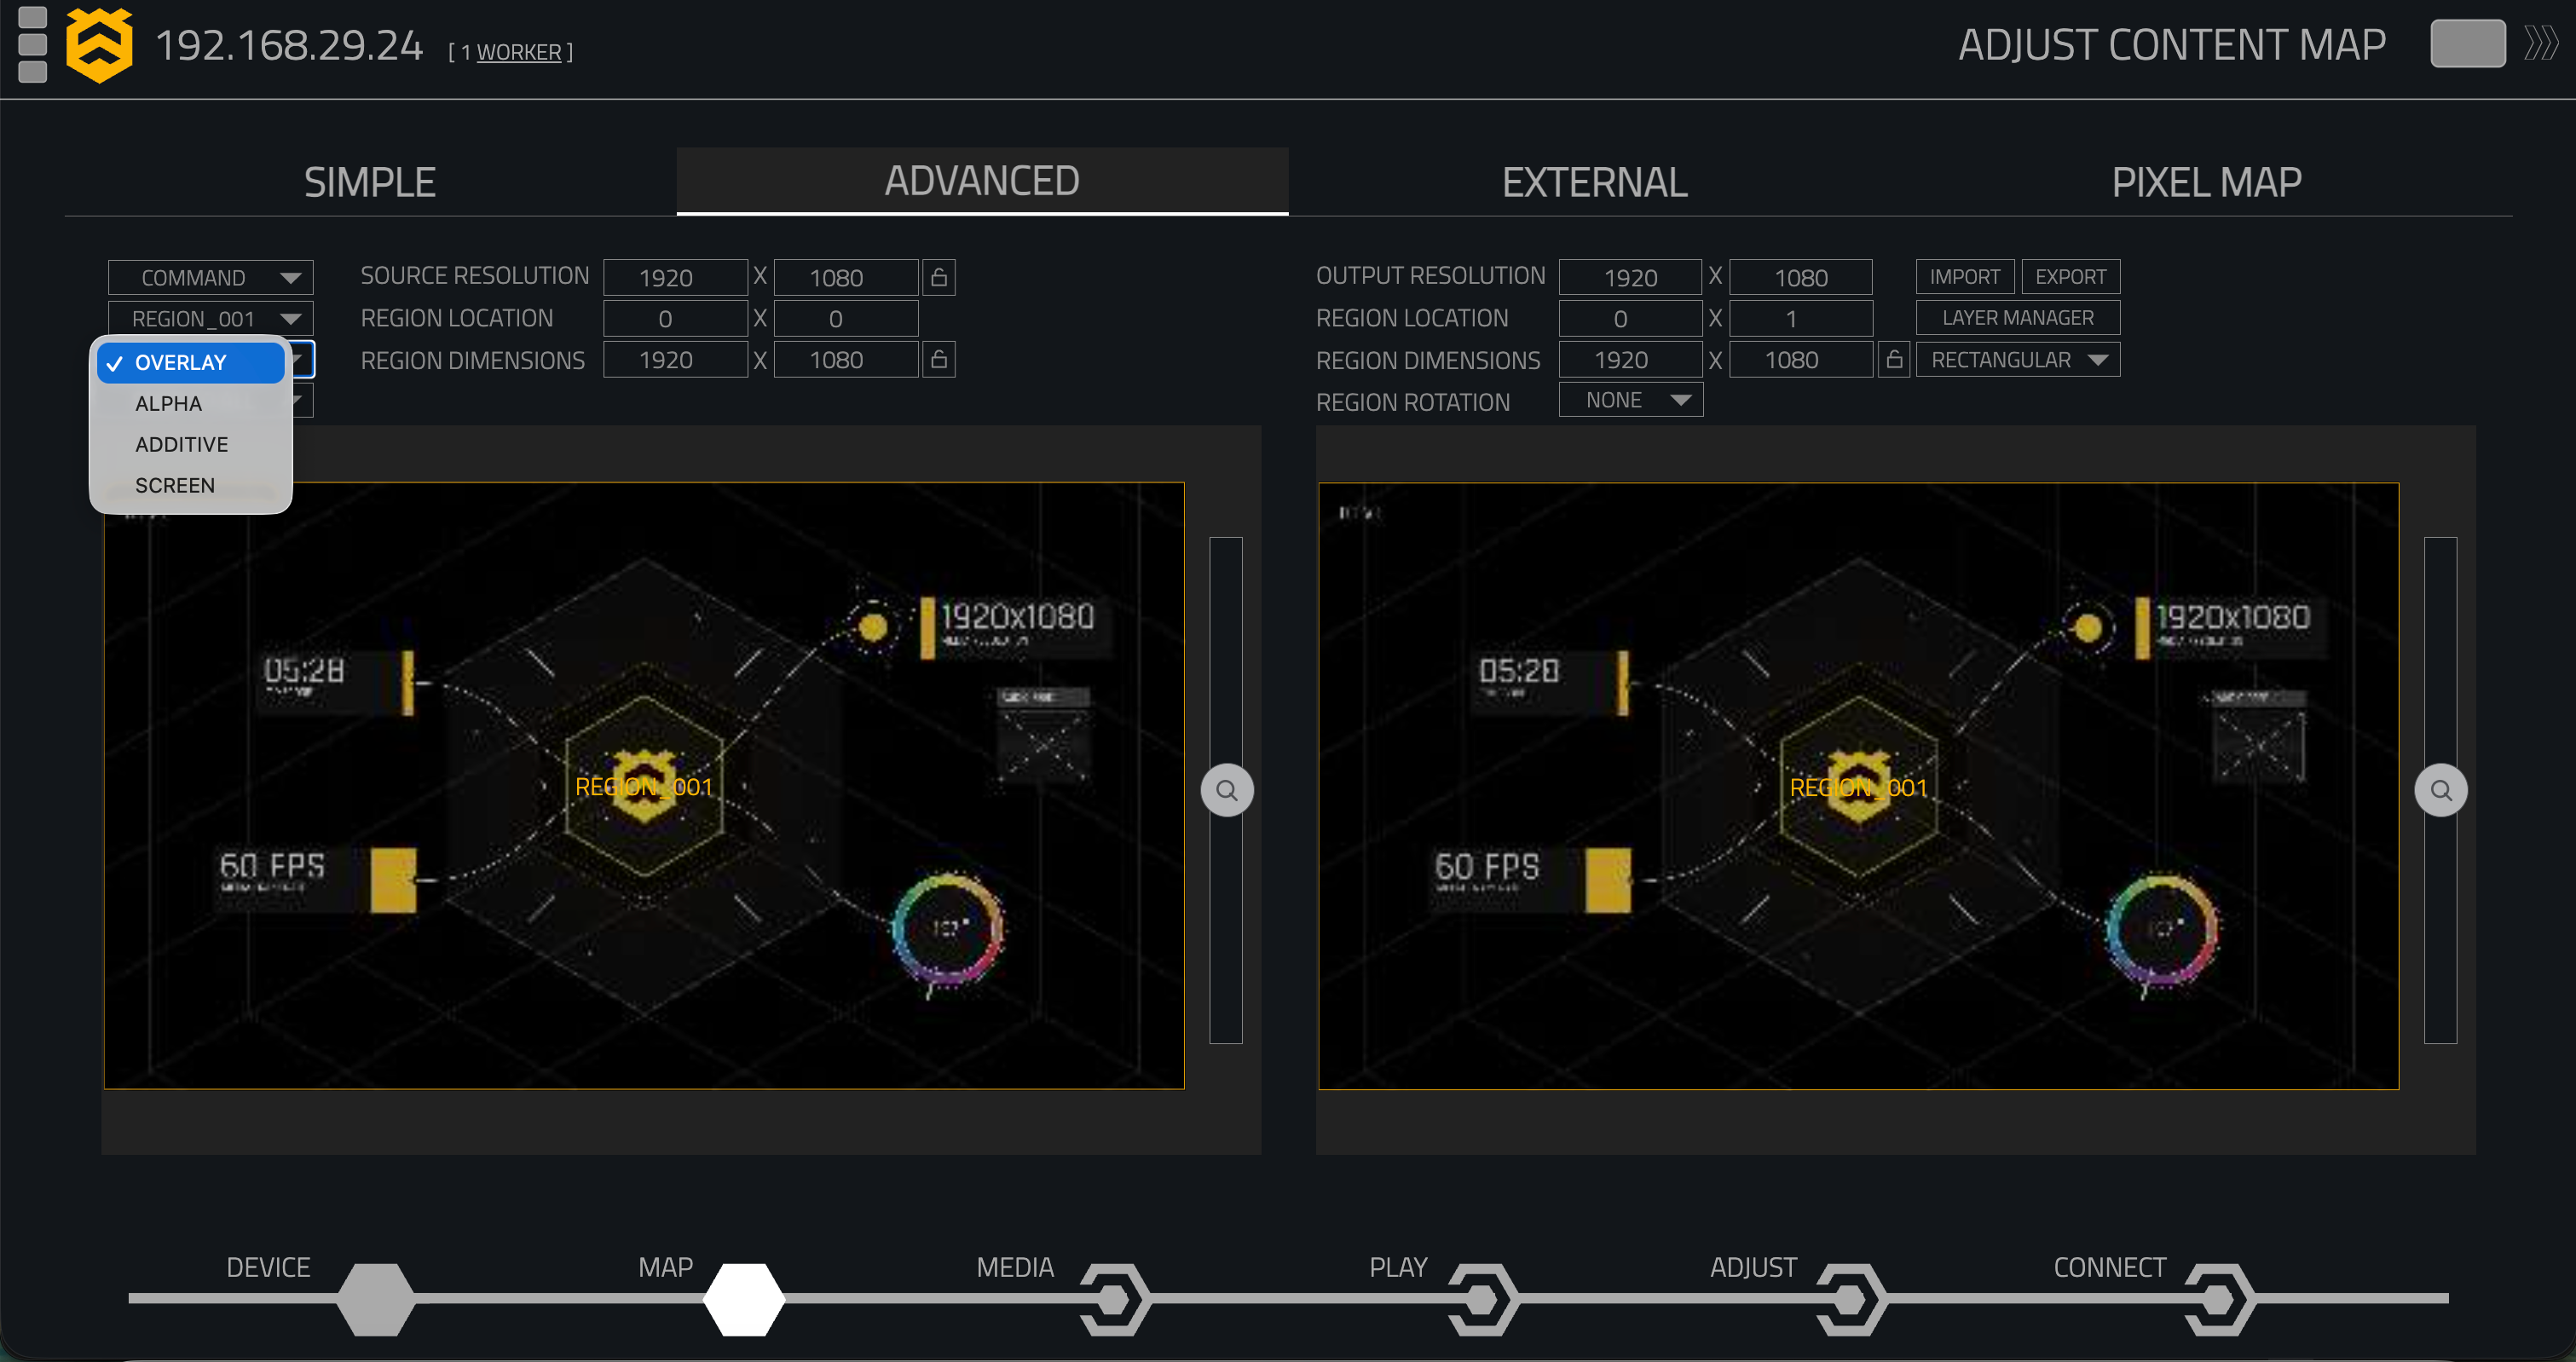
The available blending modes include:
| Mode | Description |
|---|---|
| Overlay | Regions are stacked according to their Region order. |
| Alpha | Uses the alpha channel of the media to create transparent areas within the Region. |
| Additive | Adds pixel values where Regions overlap, increasing the resulting brightness. |
| Screen | Blends overlapping Regions based on the luminosity of their content. |
Layer Manager
The Layer Manager provides control over how playback Layers are organised, combined and assigned to Advanced Mapping Regions.
Select LAYER MANAGER on the Advanced Mapping page to open the Layer Manager.
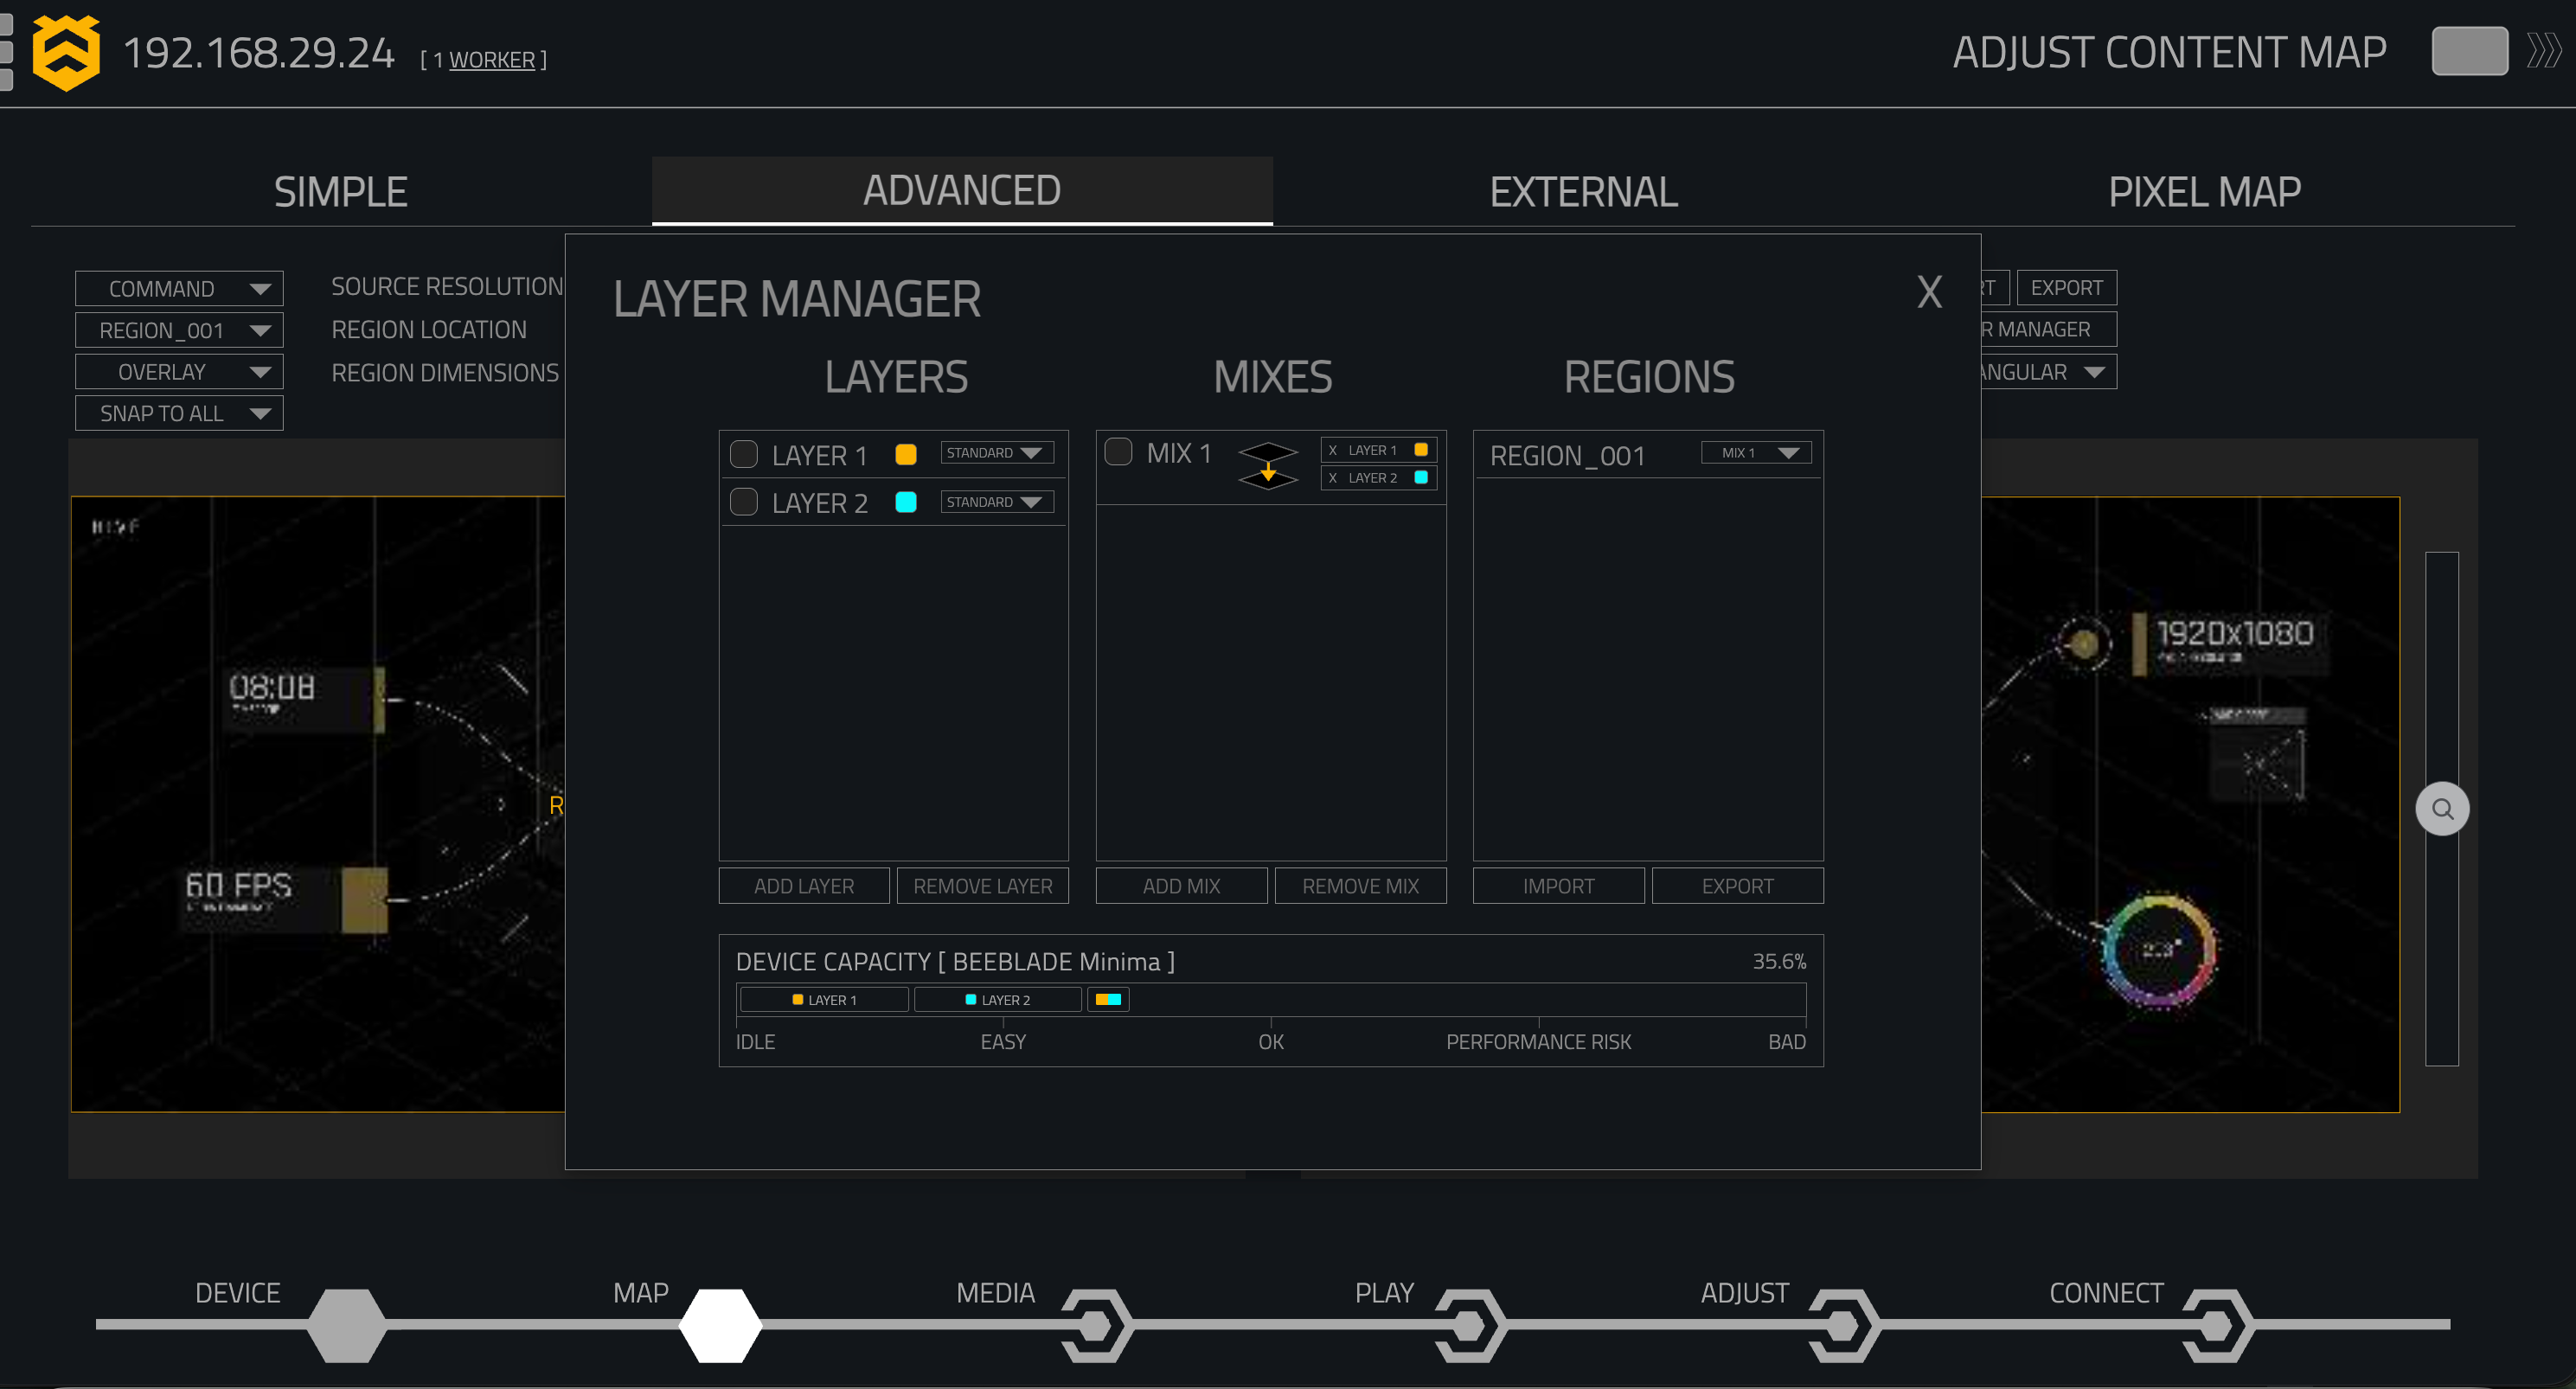
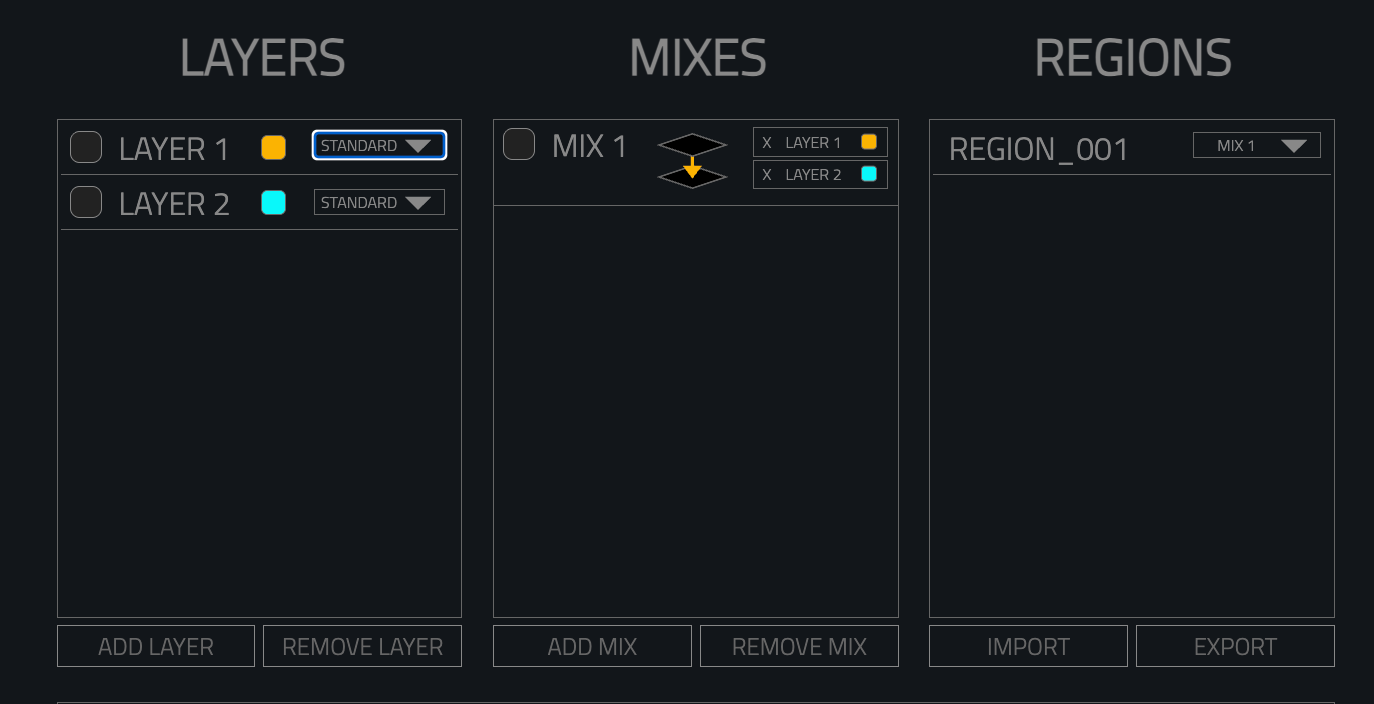
The Layer Manager is organised around three components:
Layers → Mixes → Regions
- Layers represent individual content playback Layers.
- Mixes combine one or more Layers.
- Regions determine which Mix, Layer, Media File or Template is displayed within each Advanced Mapping Region.
This allows different combinations of content Layers to be routed to different areas of the output.
Layers
The Layers section displays the playback Layers available on the Player.
Each Layer is identified by its Layer number and colour.
Layers can be added or removed using:
- ADD LAYER
- REMOVE LAYER
Each Layer can operate in one of two modes: Standard or Simple.
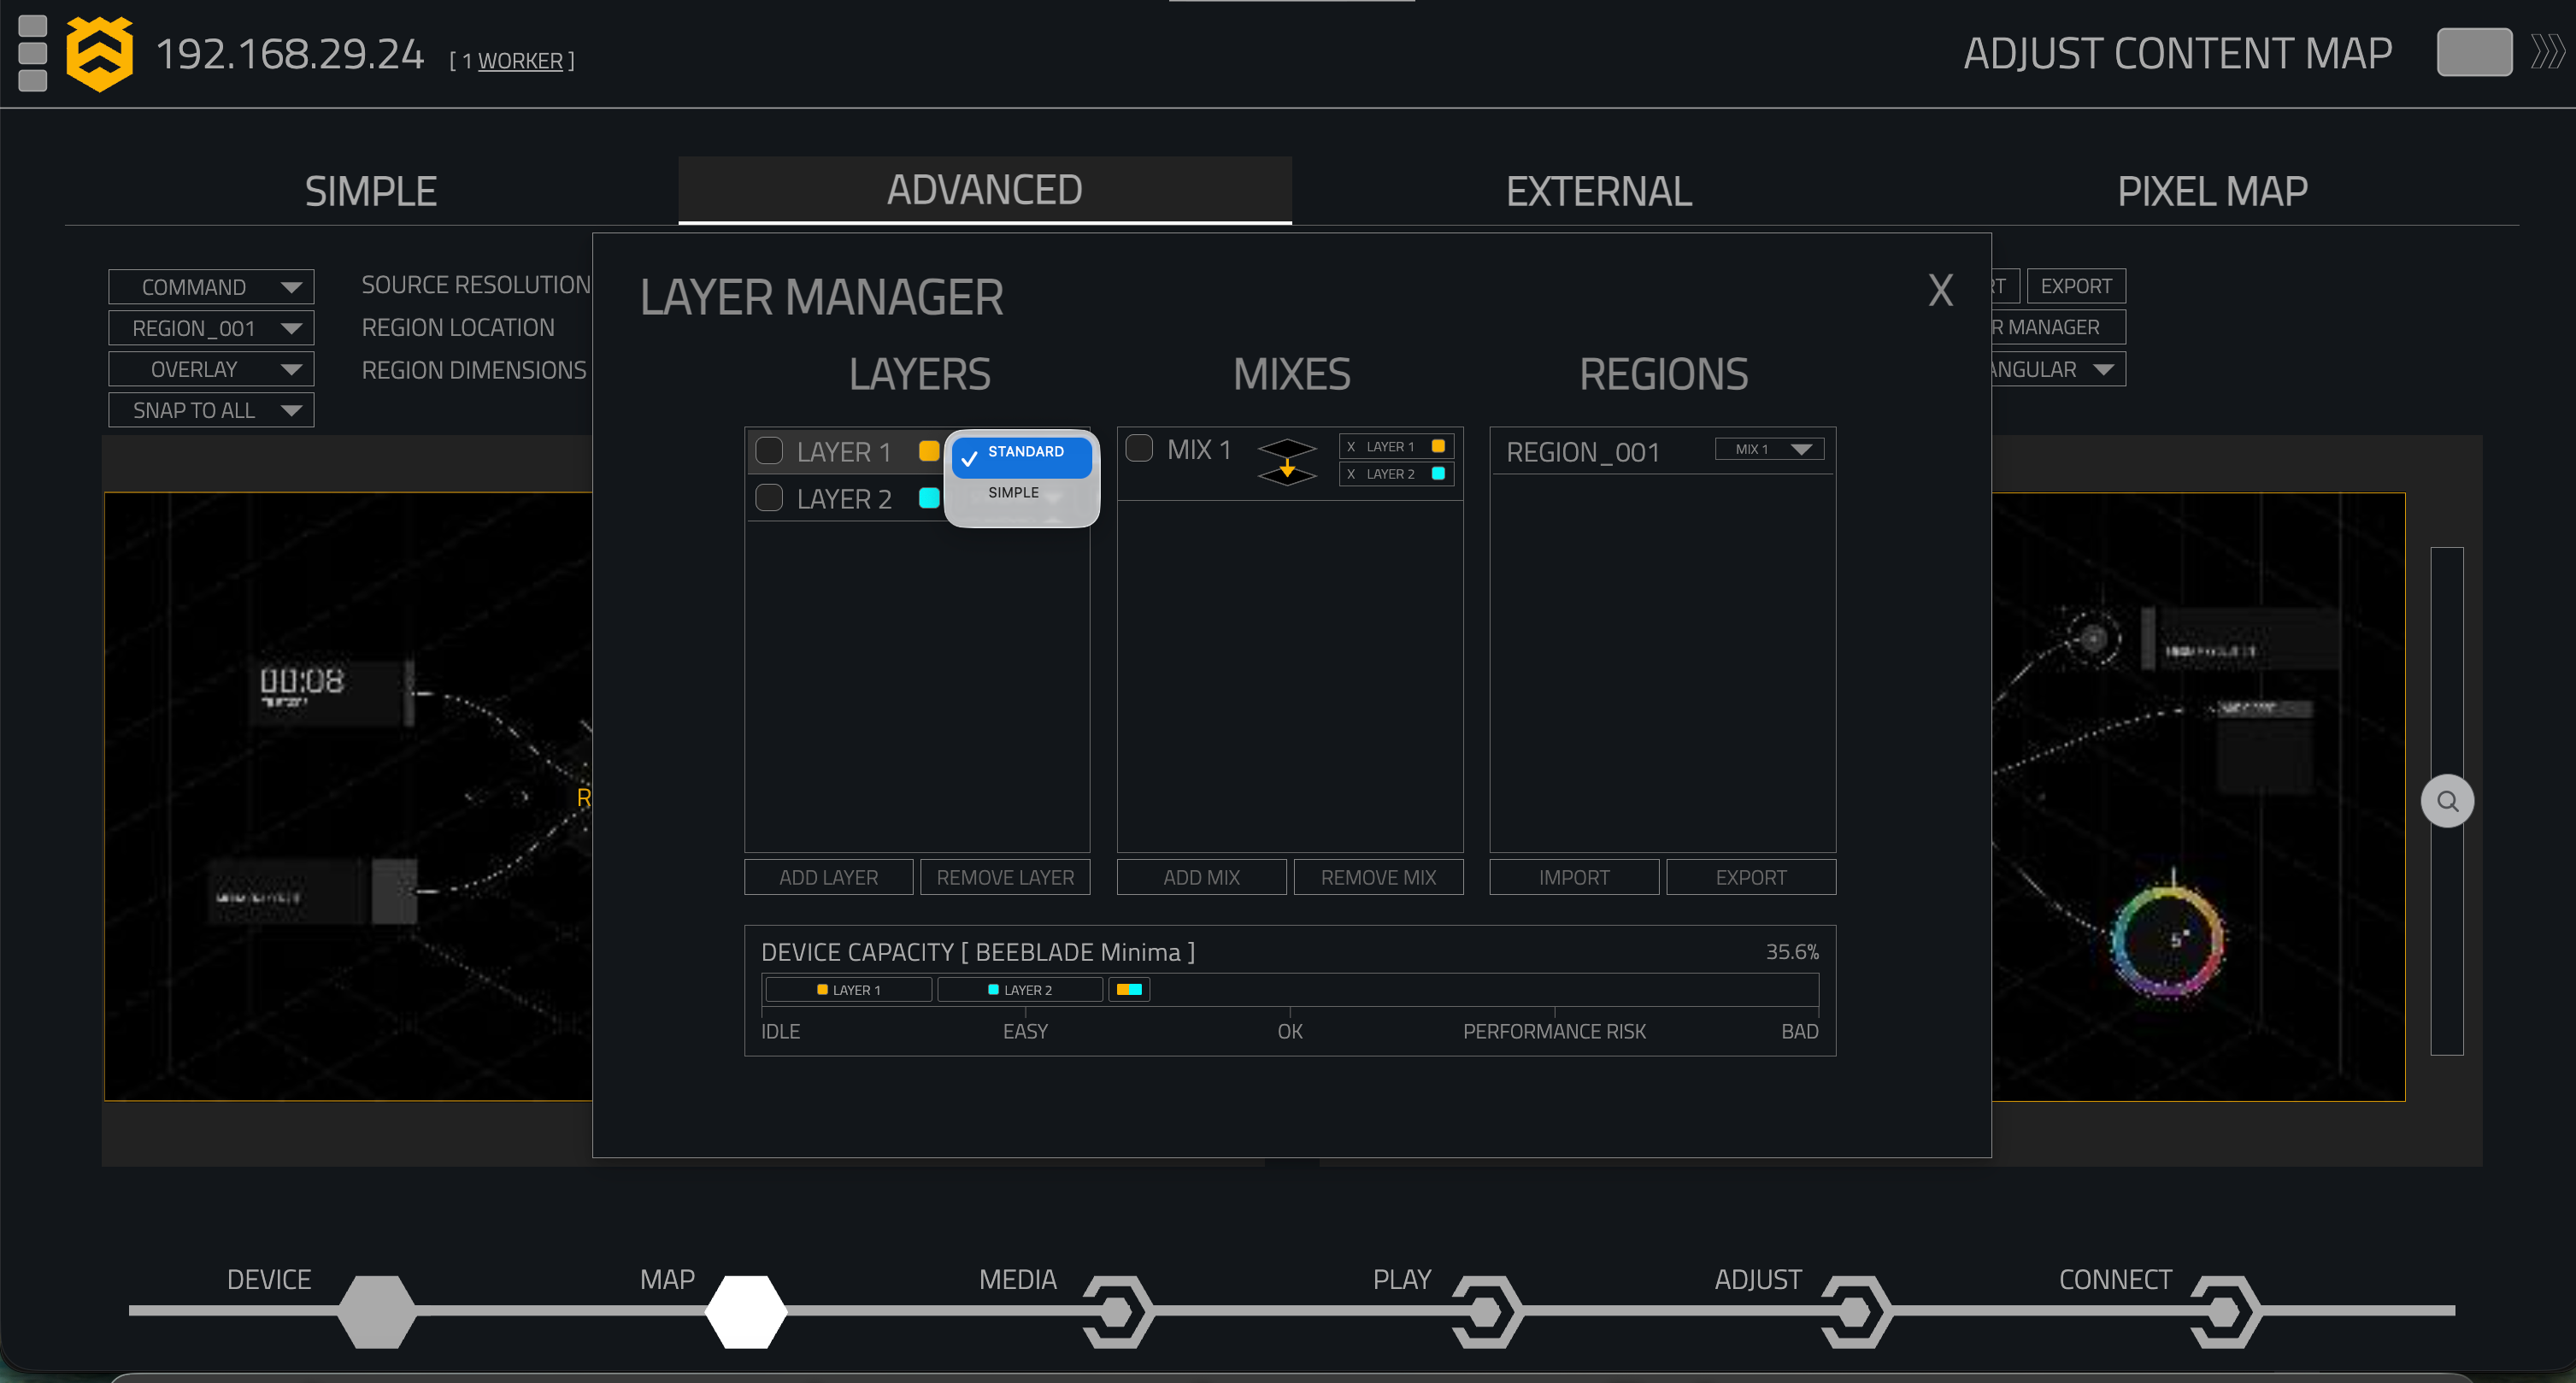
Standard
Standard provides the full Layer workflow, including access to Parameters and advanced Layer controls.
Use Standard when the Layer needs to be controlled through the normal playback and parameter workflow.
Simple
Simple provides a basic direct playback Layer with reduced controls.
When a Layer is configured as Simple, Parameters and advanced Layer controls for that Layer are disabled.
Use Simple when straightforward playback is required without the additional Parameters and advanced Layer controls.
Simple Layers replace the previous direct Layer workflow. Use Standard for normal Layer control through Parameters, or Simple when only basic direct playback control is required.
Mixes
A Mix combines one or more Layers before being assigned to a Region.
For example, a Mix could contain:
- Layer 1
- Layer 2
Additional Mixes can be created when different combinations of Layers are required.
Use:
- ADD MIX to create a new Mix.
- REMOVE MIX to remove the selected Mix.
This allows different combinations of playback Layers to be used across different mapping Regions.
Assigning Content to Regions
The Regions section of the Layer Manager determines what is assigned to each Advanced Mapping Region.
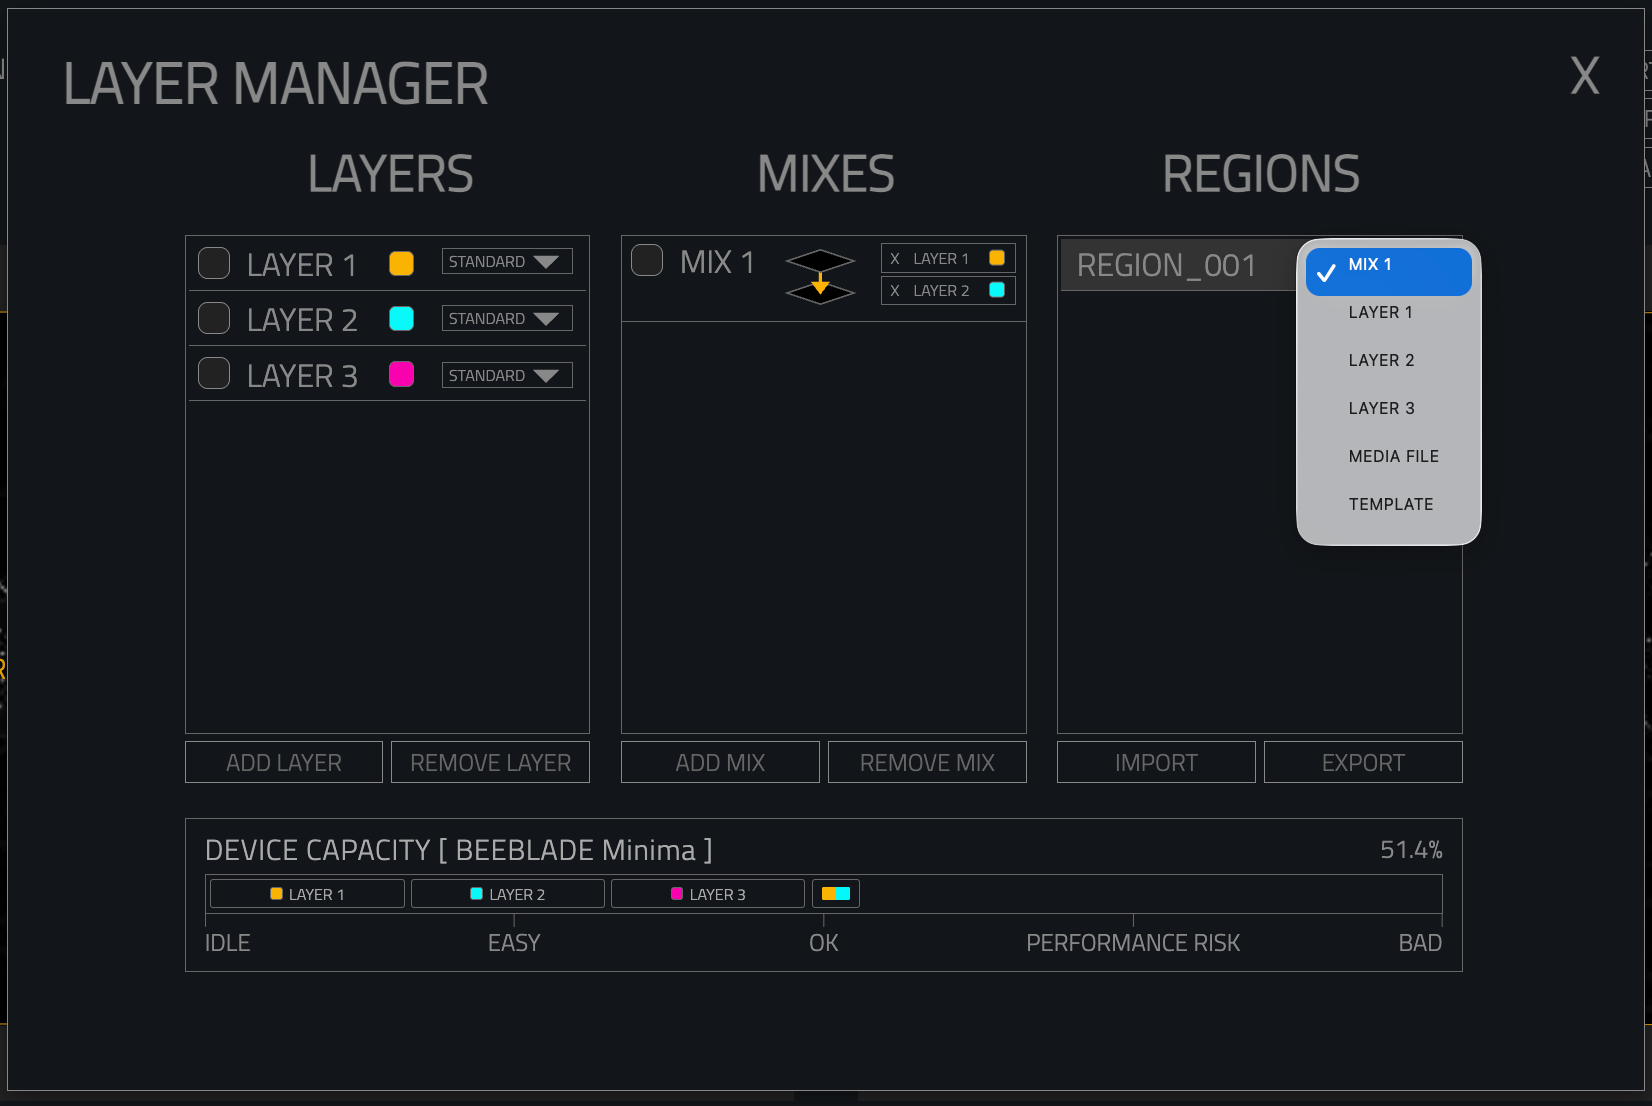
A Region can be assigned to:
- Mix
- Individual Layer
- Media File
- Template
For example:
REGION_001 → MIX 1
This means that the Layers contained within MIX 1 will be rendered through REGION_001.
Alternatively, an individual Layer can be assigned directly to a Region without using a Mix.
For more complex Layer configurations, the Layer Manager workflow can be thought of as:
Layers → Mixes → Regions
Create your Layers, combine the required Layers into Mixes, then assign those Mixes to your mapping Regions.
Layer and Mix Limits
The number of Layers and Mixes available in the Layer Manager depends on the Player model.
| Player Model | Layer Limit | Mix Limit |
|---|---|---|
| Minima | 3 | 1 |
| Osmia | 4 | 2 |
| Pluto | 6 | 3 |
| Nexus | 8 | 4 |
Higher-performance Player models support additional Layers and Mixes, allowing more complex content and mapping configurations.
Device Capacity
The Device Capacity indicator provides an overview of the estimated processing load of the current Layer Manager configuration.
The Player model and current capacity percentage are displayed above the capacity indicator.

The capacity scale is divided into the following ranges:
- IDLE
- EASY
- OK
- PERFORMANCE RISK
- BAD
Individual Layers and Mixes are represented on the capacity display, helping to show how the current configuration contributes to the overall processing load.
More complex Layer and Mix configurations may increase the processing requirements of the Player.
Configurations approaching PERFORMANCE RISK or BAD may place a significant processing load on the Player.
Command Dropdown Menu
The Command dropdown provides tools for managing Advanced Mapping Regions.
The available commands include:
| Command | Description |
|---|---|
| Add Region | Creates a new Source and Output Region. |
| Duplicate Region | Creates a copy of the selected Region, including its Source and Output settings. |
| Rename Region | Renames the selected Region. |
| Remove Region | Deletes the selected Region. |
| Region Forward (Z) | Moves the selected Region one position forward in the Region stack. |
| Region Backward (Z) | Moves the selected Region one position backward in the Region stack. |
| Region Top (Z) | Moves the selected Region to the top of the Region stack. |
| Region Bottom (Z) | Moves the selected Region to the bottom of the Region stack. |
These controls allow Regions to be organised and layered when building more complex mapping configurations.
Adding and Removing Regions
Adding a Region
To create a new Region:
- Open the Command dropdown.
- Select Add Region.
- A new Source Region and corresponding Output Region will be created.
The new Region can then be configured independently.
Removing a Region
To remove a Region:
- Select the Region you want to remove.
- Open the Command dropdown.
- Select Remove Region.
The selected Region will be removed from the mapping configuration.
Importing and Exporting Regions
Advanced Mapping configurations can be imported and exported using JSON files. This allows mapping configurations to be backed up, reused or transferred between compatible Players.
Importing Regions
To import a mapping configuration:
- Select IMPORT on the Advanced Mapping page.
- Select the JSON file containing the saved mapping configuration.
- The imported Region configuration will be loaded into Advanced Mapping.
Exporting Regions
To export the current mapping configuration:
- Select EXPORT on the Advanced Mapping page.
- Save the exported JSON file.
The exported configuration can be retained as a backup or imported into another compatible Player.