Timeline
Creating and managing timelines on the Hive software allows for intricate playback synchronisations and media compositing. Using these tools, you can create a nuanced and professional presentation of your media on the timeline, with full control over how and when visual changes occur during playback.
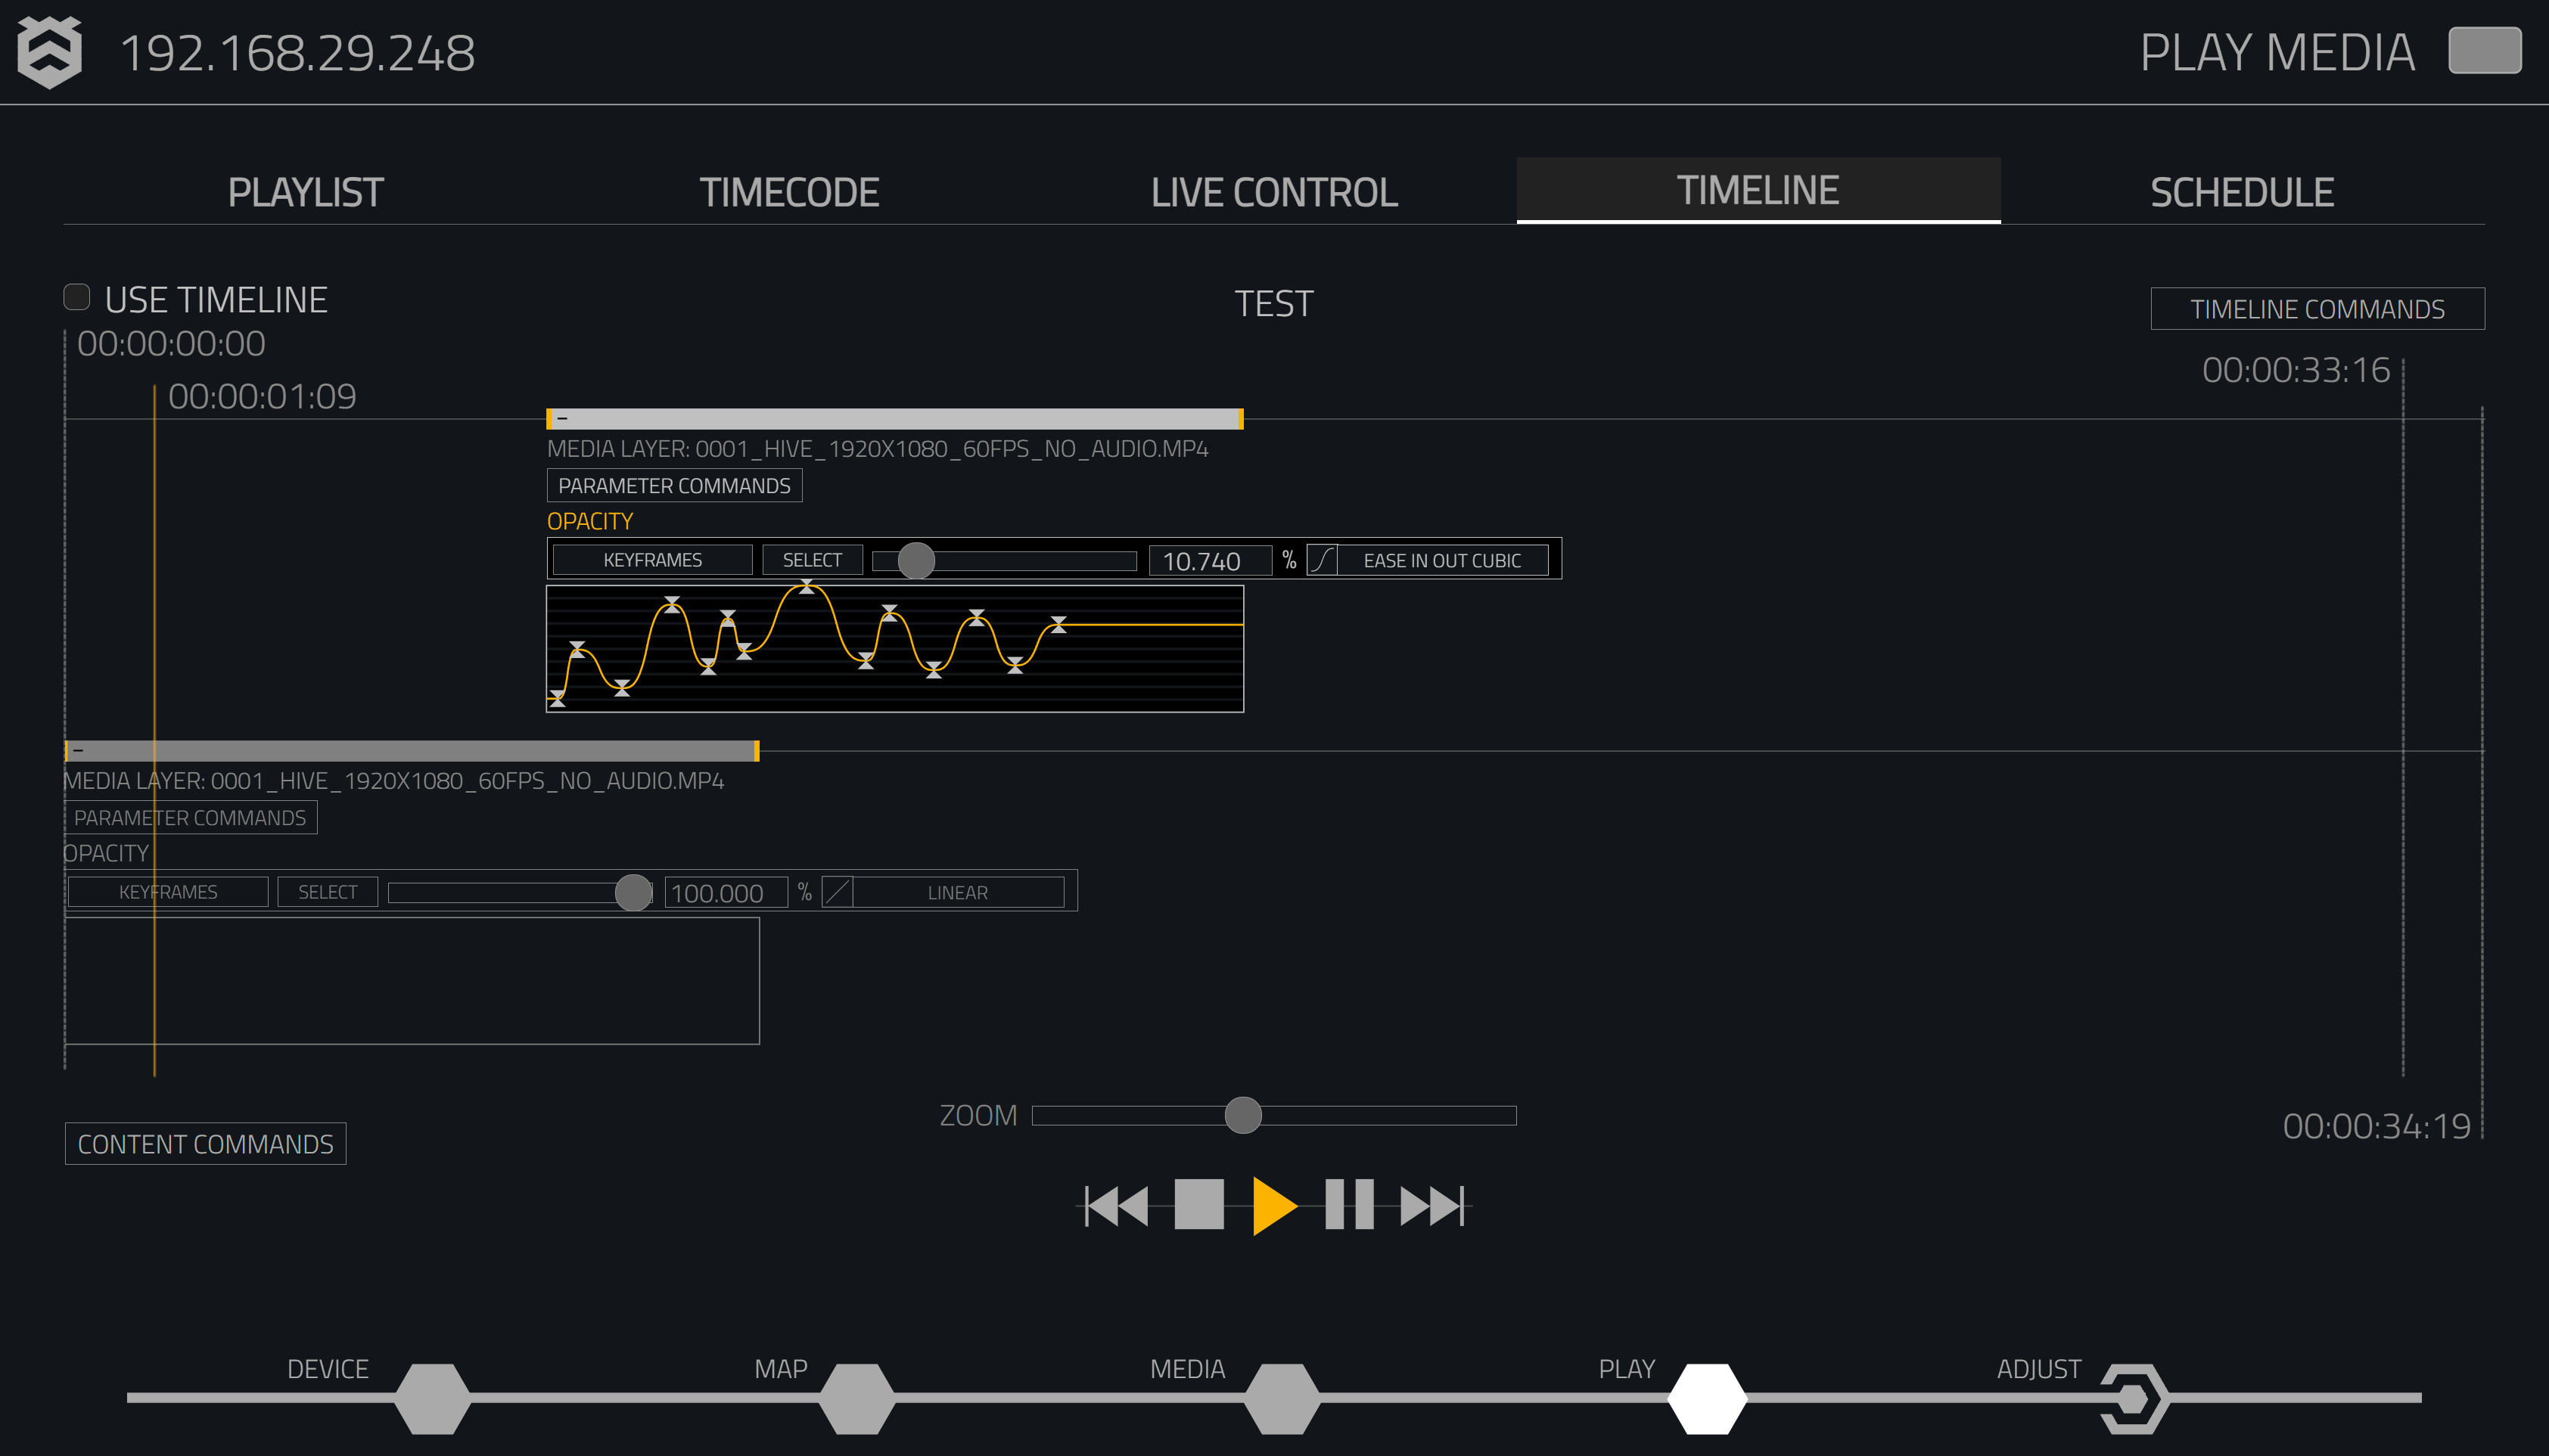
Activating the Timeline
Selecting the checkbox next to Use Timeline will activate the current timeline on your Hive player.
Adding Content to the Timeline
To add content to your timeline:
- Select the Content Commands button.
- Choose the type of content you would like to import into the timeline. You can select from the following:
- Add media content
- Add template
- Add input
- Add colour
Parameter Commands
The Parameter Commands function lets you add customisation to your content on the timeline. This is useful for on-the-fly tweaks and adjustments.
To add a parameter command:
- Add a piece of content to the timeline and expand it using the little plus icon.
- Select the Parameter Commands button and choose a parameter command:
- Add opacity: A keyframe graph will appear to control the opacity of the clip on the timeline.
- Add blend mode: A keyframe table will appear to control blend modes throughout the content's duration.
- Add size mode: A keyframe table will appear to control the sizing of content throughout the clip's duration.
To remove a parameter command, highlight the parameter text in orange, then click the Remove Command button from the parameter commands menu.
Adding Keyframes
You can add keyframes to a content command parameter by selecting the command so that the keyframe graph is highlighted in orange. Then, choose where you want to add the keyframe.
To move the keyframe forward or backward throughout the timeline, hold the Shift button and use the left and right arrow keys. For the opacity parameter, you can also use the scrollbar to adjust the opacity intensity.
Easing Types
Easing type selections provide control over the animation curve, allowing you to smooth transitions or create more abrupt effects. The table below shows the available easing types:
| Easing Type | Description |
|---|---|
| Line | Linear easing, no curve |
| Ease in sine | Accelerates as a sine wave |
| Ease out sine | Decelerates as a sine wave |
| Ease in cubic | Accelerates as a cubic function |
| Ease out cubic | Decelerates as a cubic function |
| Ease in out cubic | Accelerates and decelerates using a cubic function |
| Ease in quint | Accelerates as a quintic function |
| Ease out quint | Decelerates as a quintic function |
| Ease in circle | Accelerates as a circular curve |
| Ease out circle | Decelerates as a circular curve |
| Ease in out circle | Accelerates and decelerates in a circular motion |
| Ease in elastic | Accelerates with elasticity |
| Ease out elastic | Decelerates with elasticity |
| Ease in out elastic | Elastic easing in and out |
| Ease in quad | Accelerates as a quadratic function |
| Ease out quad | Decelerates as a quadratic function |
| Ease in out quad | Accelerates and decelerates using a quadratic function |
| Ease in quart | Accelerates as a quartic function |
| Ease out quart | Decelerates as a quartic function |
| Ease in out quart | Accelerates and decelerates using a quartic function |
| Ease in expo | Exponential acceleration |
| Ease out expo | Exponential deceleration |
| Ease in out expo | Exponential acceleration and deceleration |
| Ease in back | Accelerates while moving backward |
| Ease out back | Decelerates and overshoots slightly |
| Ease in out back | Moves backward then forward, overshooting |
| Ease in bounce | Accelerates with a bouncing effect |
| Ease out bounce | Decelerates with a bouncing effect |
Timeline Commands
The Timeline Commands dropdown provides a list of options, including importing and exporting the timeline, setting frame rates, and synchronising to workers.
Timeline Properties
In the Timeline Properties section, you have access to all the settings for your timeline. Each property can be configured to suit your needs:
- Title: The name of the timeline.
- Duration: The current duration of the timeline.
- Framerate: The framerate the timeline is currently set to.
- Resolution: The content resolution of the timeline.
- Queen Worker Sync: Synchronises the timeline with workers connected to the queen.
Clearing the Timeline
To completely clear the timeline, use the Timeline Commands button. This is helpful if you want to start a new timeline from scratch.
Importing and Exporting Timelines
You can import and export timelines, which is useful for archiving or later use.
To import a timeline:
- Select the Timeline Commands button.
- Choose Import Timeline and select the file from your device.
Adding Timelines to the Media List
By adding your timeline to the media list, it becomes an independent piece of content. You can play the exported timeline in the media list or add it to a playlist or timecode list.
To add a timeline to the media list:
- Select the Timeline Commands button.
- Choose Add to Media List.
If you amend the timeline, be sure to update your media file using the Update in Media List button located in the timeline properties dropdown.
Synchronising Timelines with Workers
When using a queen and worker format, you can synchronise timelines so they match between the queen and worker devices. To do this, select the Timeline Commands button and choose Sync to Workers. You will be asked for confirmation, as this action replaces the timeline on the workers.