Live Control
The Live Control tab lets users configure and customise a control interface for Hive players on the fly. Users can create and manage layouts, add controls, and integrate MIDI devices for a streamlined control experience.
Managing Layouts
The Live Control page is divided into layouts and pages. Users can create pages with different layouts and save them to a single layout list.
Available Layouts
We offer a selection of pre-designed templates to help users get started:
- 4_Faders: Provides 4 faders for controlling parameters like intensity, opacity, or other values that need sliding scales.
- 4x2_Strip: Features two rows of four buttons, perfect for quickly toggling effects or parameters.
- Alias_8: Offers a combination of rotary dials and buttons, ideal for controlling multiple parameters at once.
- APC40_MKII: Modeled after the APC40 MKII MIDI controller, designed for users familiar with this device.
Insert screenshot of layout template dropdown
Save a Layout
Saving a layout allows the user to store a customised interface for future use:
- Navigate to the 'Manage Layouts' dropdown menu.
- Click the 'Save Layout' option.
- A prompt will appear asking for a layout name.
- Type a unique name for easy identification and click 'Save'.
Insert screenshot of Manage Layouts dropdown for saving a layout
Remove a Layout
To delete a layout from the device:
- Access the 'Manage Layouts' dropdown.
- Select the layout you wish to delete from the list.
- Click 'Remove Layout'.
Insert screenshot of Manage Layouts dropdown for removing a layout
Import and Export Layouts
Users can import and export layouts to and from the connected control device.
-
To import a layout:
- Click on the 'Manage Layouts' dropdown.
- Select the 'Import Layout' option.
- Choose a layout file (typically in JSON format) from your device.
-
To export a layout:
- Click on the 'Manage Layouts' dropdown.
- Select the 'Export Layout' option.
- Save the layout file to your device.
Insert screenshot of Import and Export options
Selecting and Naming Layouts
- Open the Select Layout dropdown to view available layouts.
- Choose a layout from the list, and it will load onto the Live Control page.
- To rename the selected layout, click the 'Set Name' button and enter a new name.
Insert screenshot of 'Select Layout' dropdown and 'Set Name' options
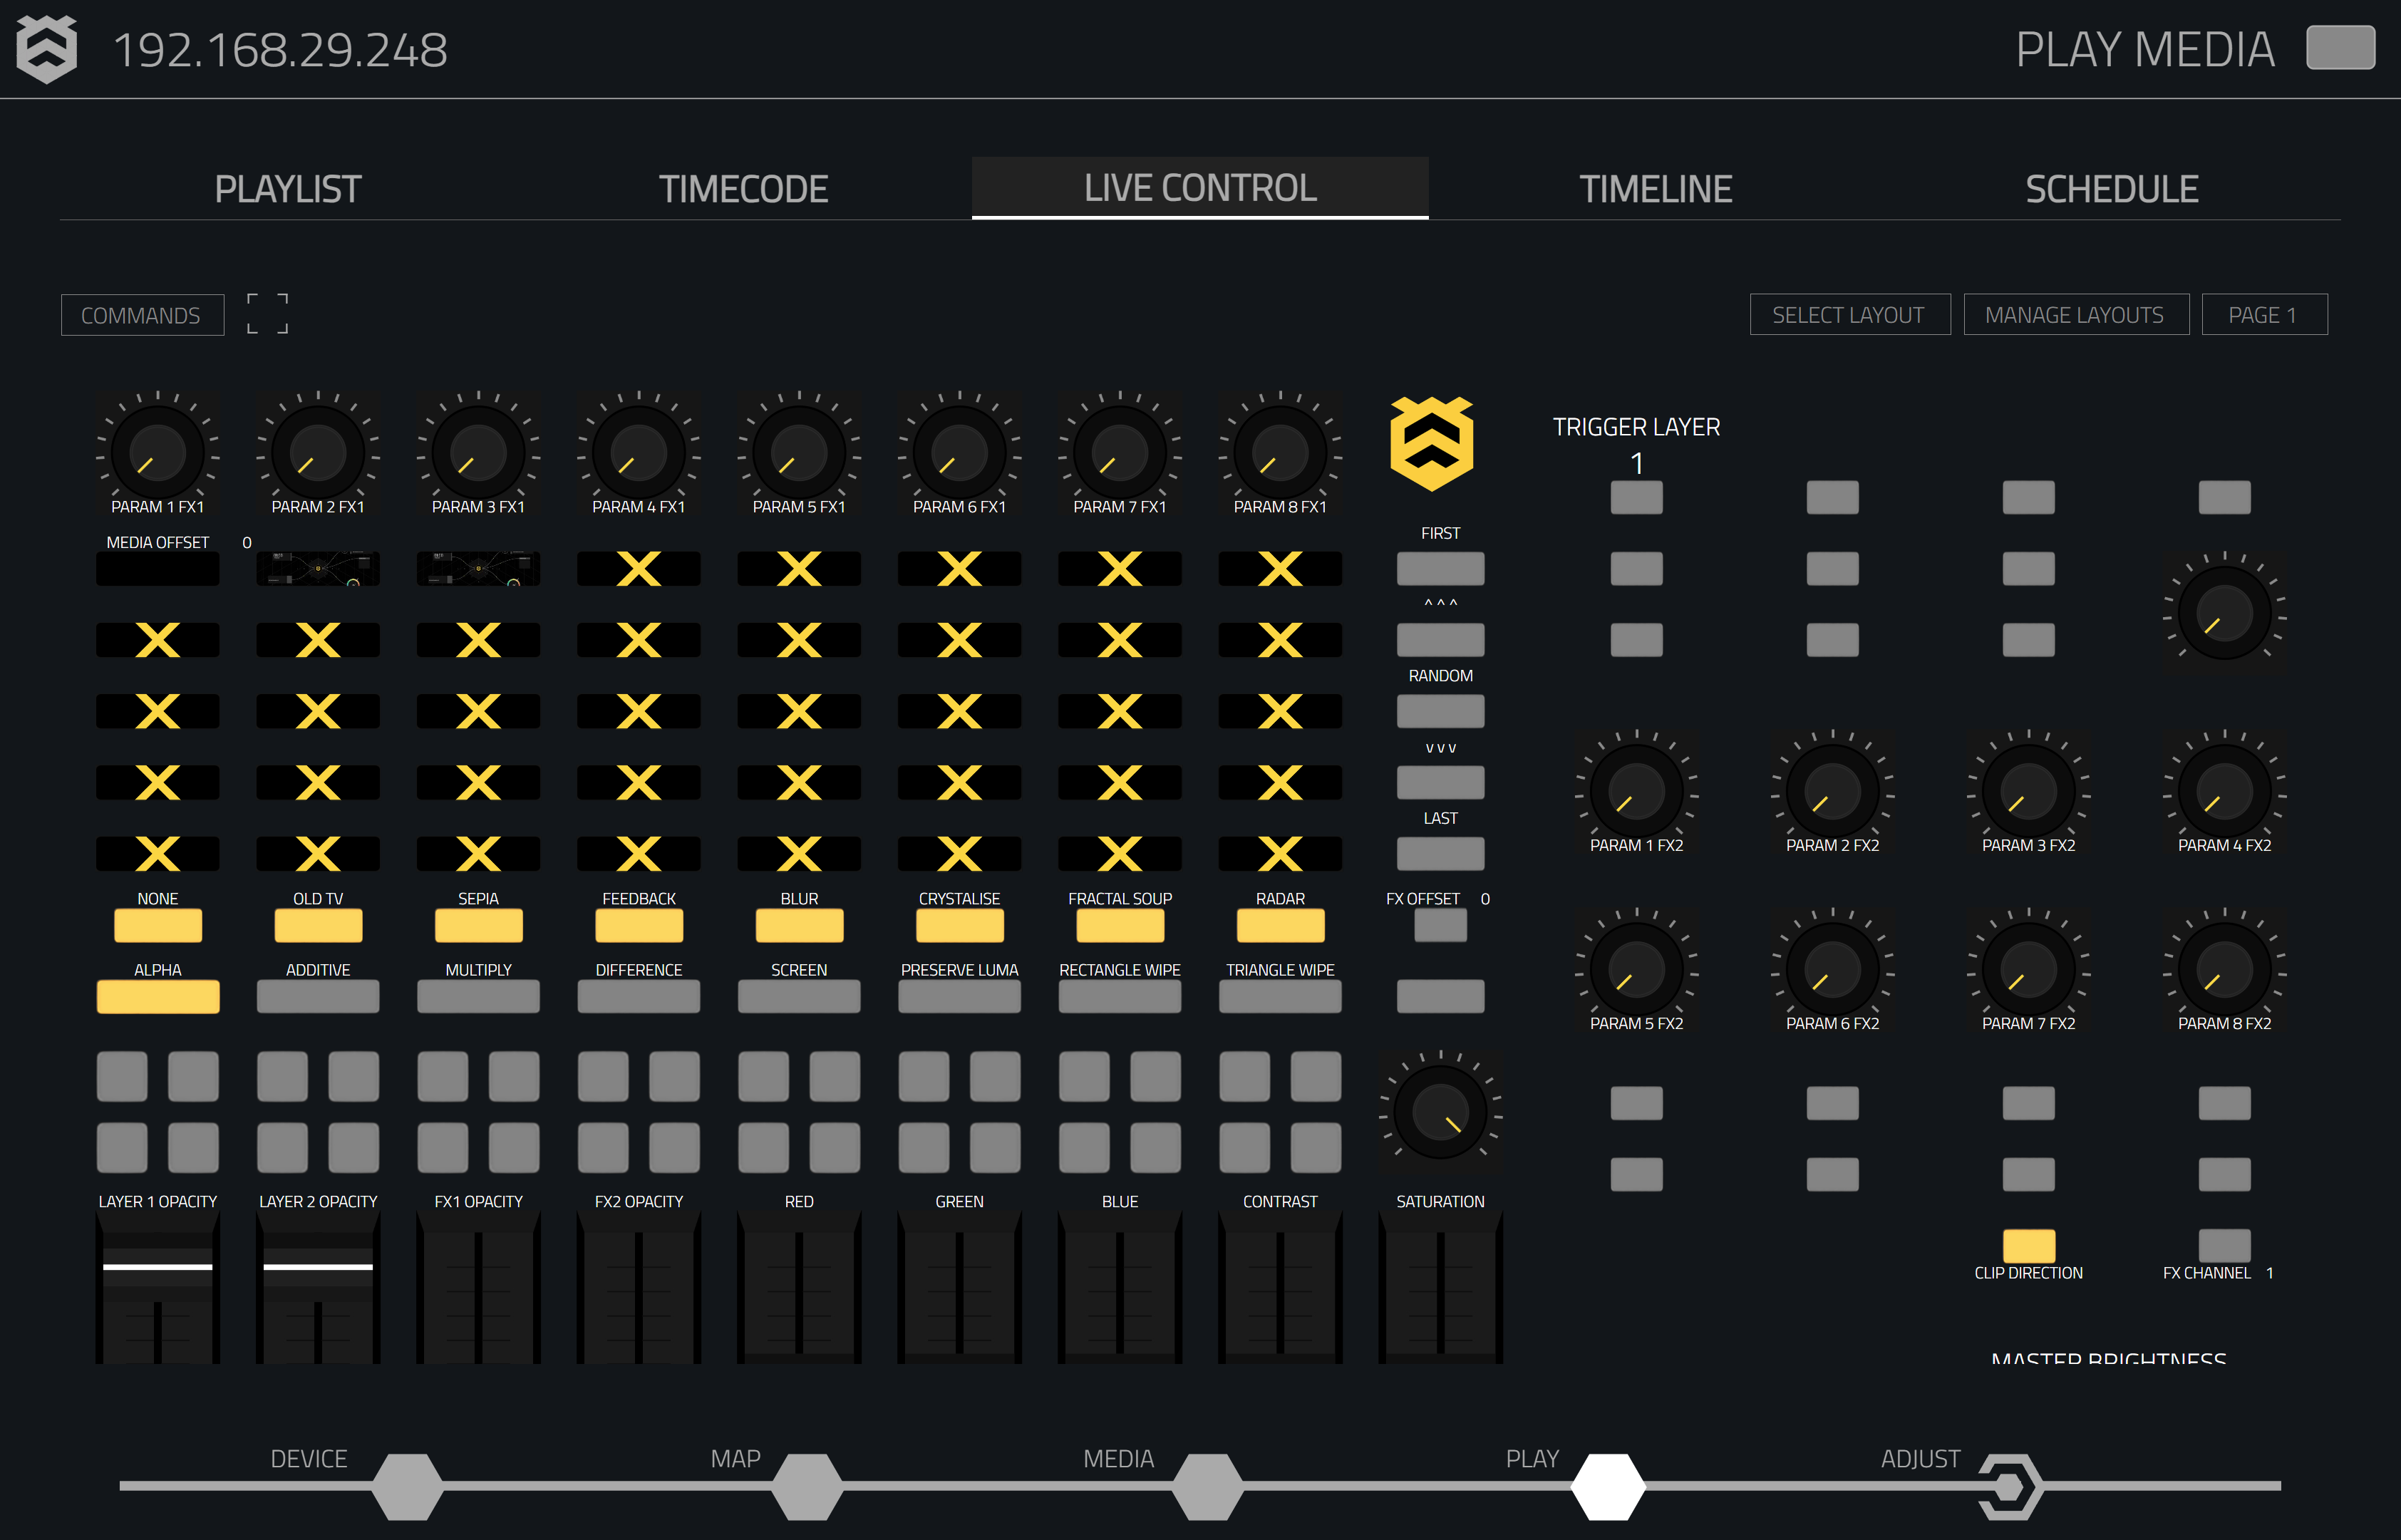
Customising Live Control Pages
Once a layout is selected, users can further customise the page by adding controls like buttons, faders, knobs, images, and text. Hive players support up to 16 layout pages, each with different layouts.
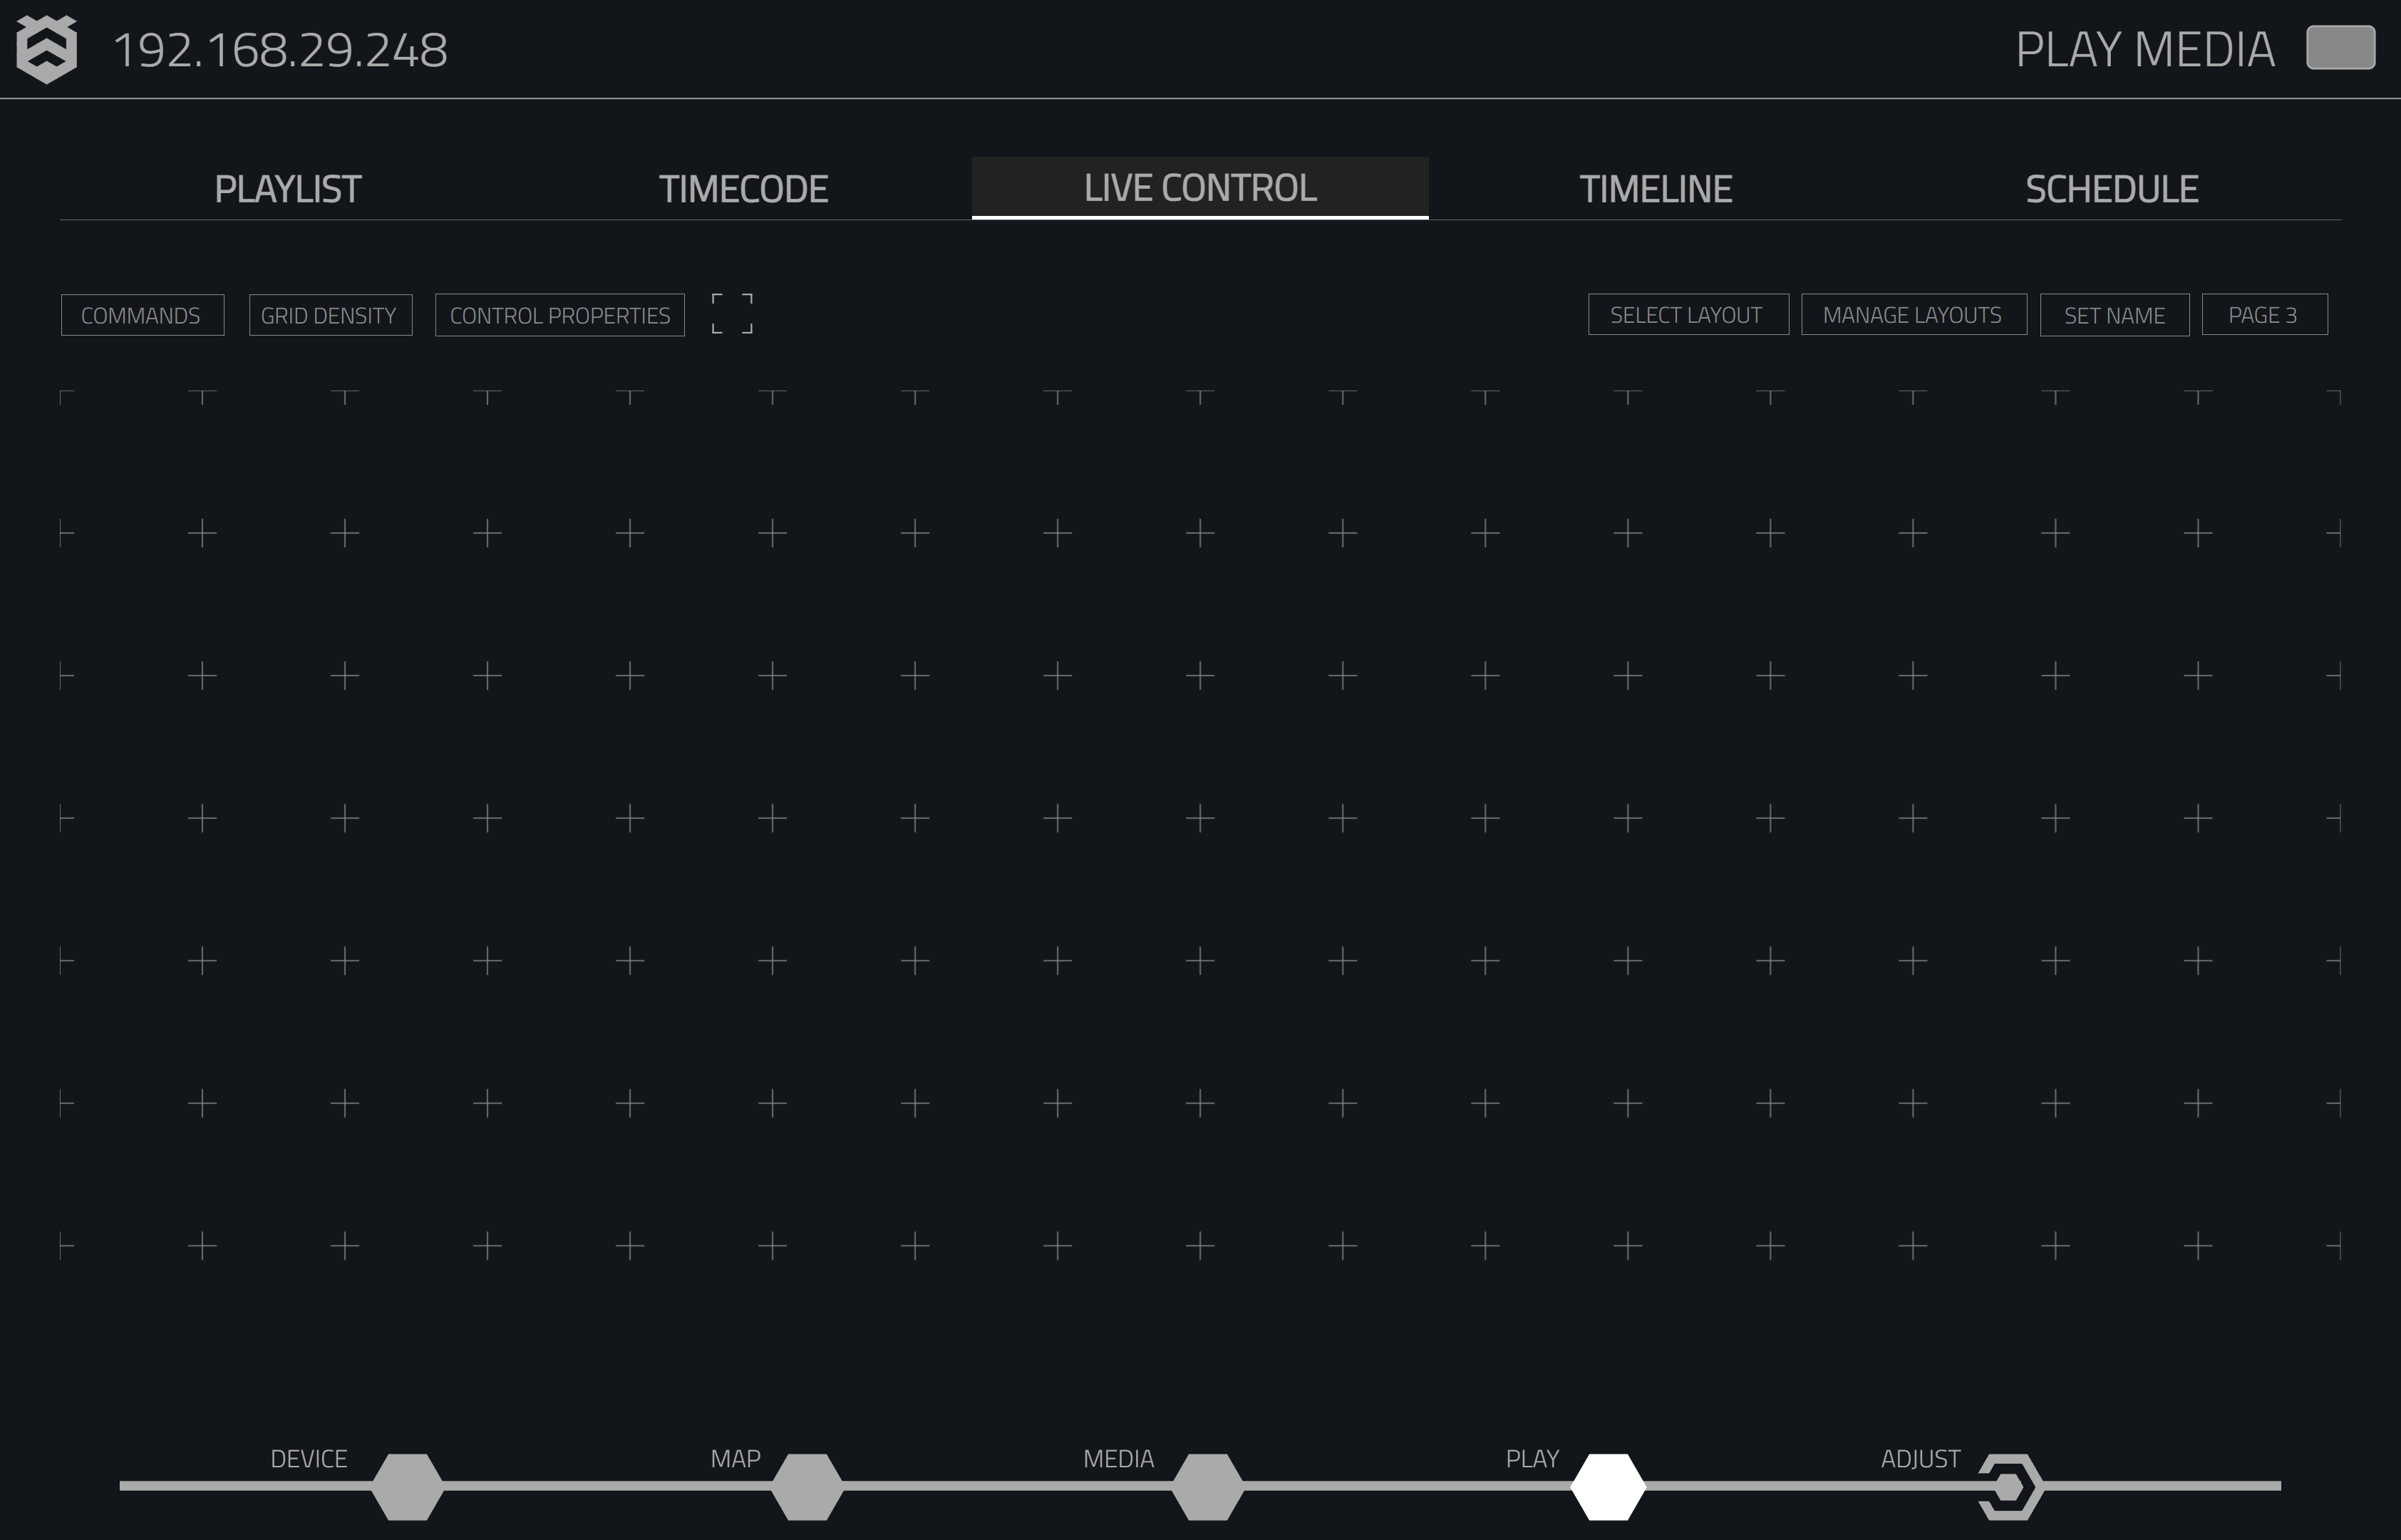
Insert screenshot of the UI when starting to customise the layout page
Creating a New Layout Page
- Select a pre-designed layout or start with a blank grid.
- Enter Edit Controls mode to begin customising.
Edit Controls Function
The Edit Controls function enables users to switch the live control interface into edit mode. In this mode, users can add, move, or delete buttons, faders, knobs, and other UI elements.
To add controls:
- Click the Commands dropdown and select a control type.
- Drag and drop the control element onto the grid.
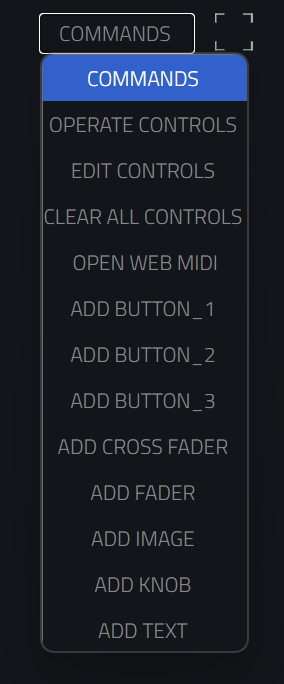
Control Types
-
Buttons: Can be used to trigger specific commands or toggle parameters.
-
Button Types: Button_1, Button_2, Button_3.
-
-
-
-
-
Cross Faders: Allows smooth transitions between two different parameters or media sources.

-
Faders: Use sliding scales to control parameters like opacity, volume, or intensity.
-
Rotary Knobs: Rotational controls to adjust parameters like contrast, hue, saturation, or other effects.
-
Images: Add images to the layout for visual control elements.

-
Text: Insert text labels or display dynamic information like timecode values.

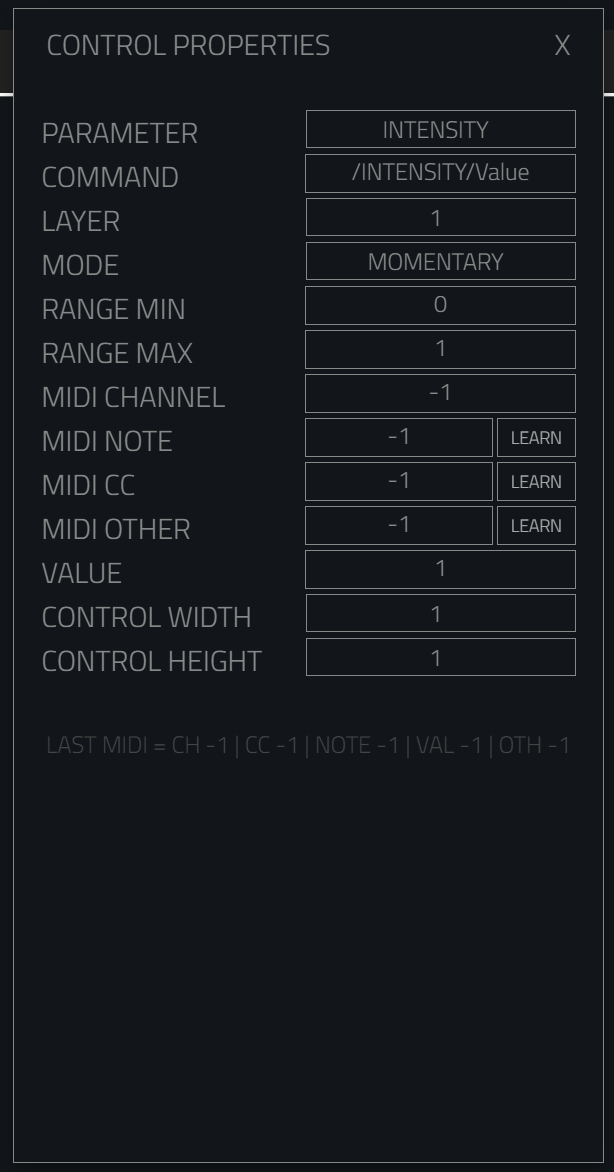
Control Properties
Each control element has configurable properties:
- Parameter: What the control will manipulate (e.g., intensity, hue, blend mode).
- Command: The specific command path (e.g.,
/INTENSITY/Value). - Layer: The layer the control will affect.
- Mode: Sets whether the control is momentary or toggle.
- Range Min/Max: Defines the value range for the control (e.g., from 0 to 1).
- MIDI Channel/Note/CC/Other: For assigning MIDI controls. These can be manually set or learned by selecting 'Learn' next to the parameter.
- Value: Current value of the control.
- Control Width/Height: Defines the size of the control on the grid.
Here are some common parameters available when configuring controls:
- Movement Speed
- Blend Mode
- Intensity
- Red, Green, Blue
- Hue
- Saturation
- Contrast
- LUT
- Strobe
- Timecode (TC) Hour, Minute, Second, Frame
- FX1 Select, FX2 Select, etc.
- Position X, Y, Z
- Rotation X, Y, Z
Operating the Controls
Once the layout is ready, switch to Operate Controls mode:
- Select the Commands dropdown.
- Click the Operate Controls button. This will hide the grid and make the layout live.
The user can also make this page full screen by selecting the box next to control properties.
Live Control Tab in Queen and Worker Mode
The Live Control Tab remains accessible in Queen and Worker Mode. The Queen handles all live control actions, and Worker devices will follow along with the Queen's commands in real-time, ensuring synchronised control across the system.