Advanced Mapping
The Advanced Mapping Tab provides a detailed configuration space for creating complex layouts and gaining precise control over the media mapping process. It is designed to address the needs of intricate display setups, making it ideal for advanced users.
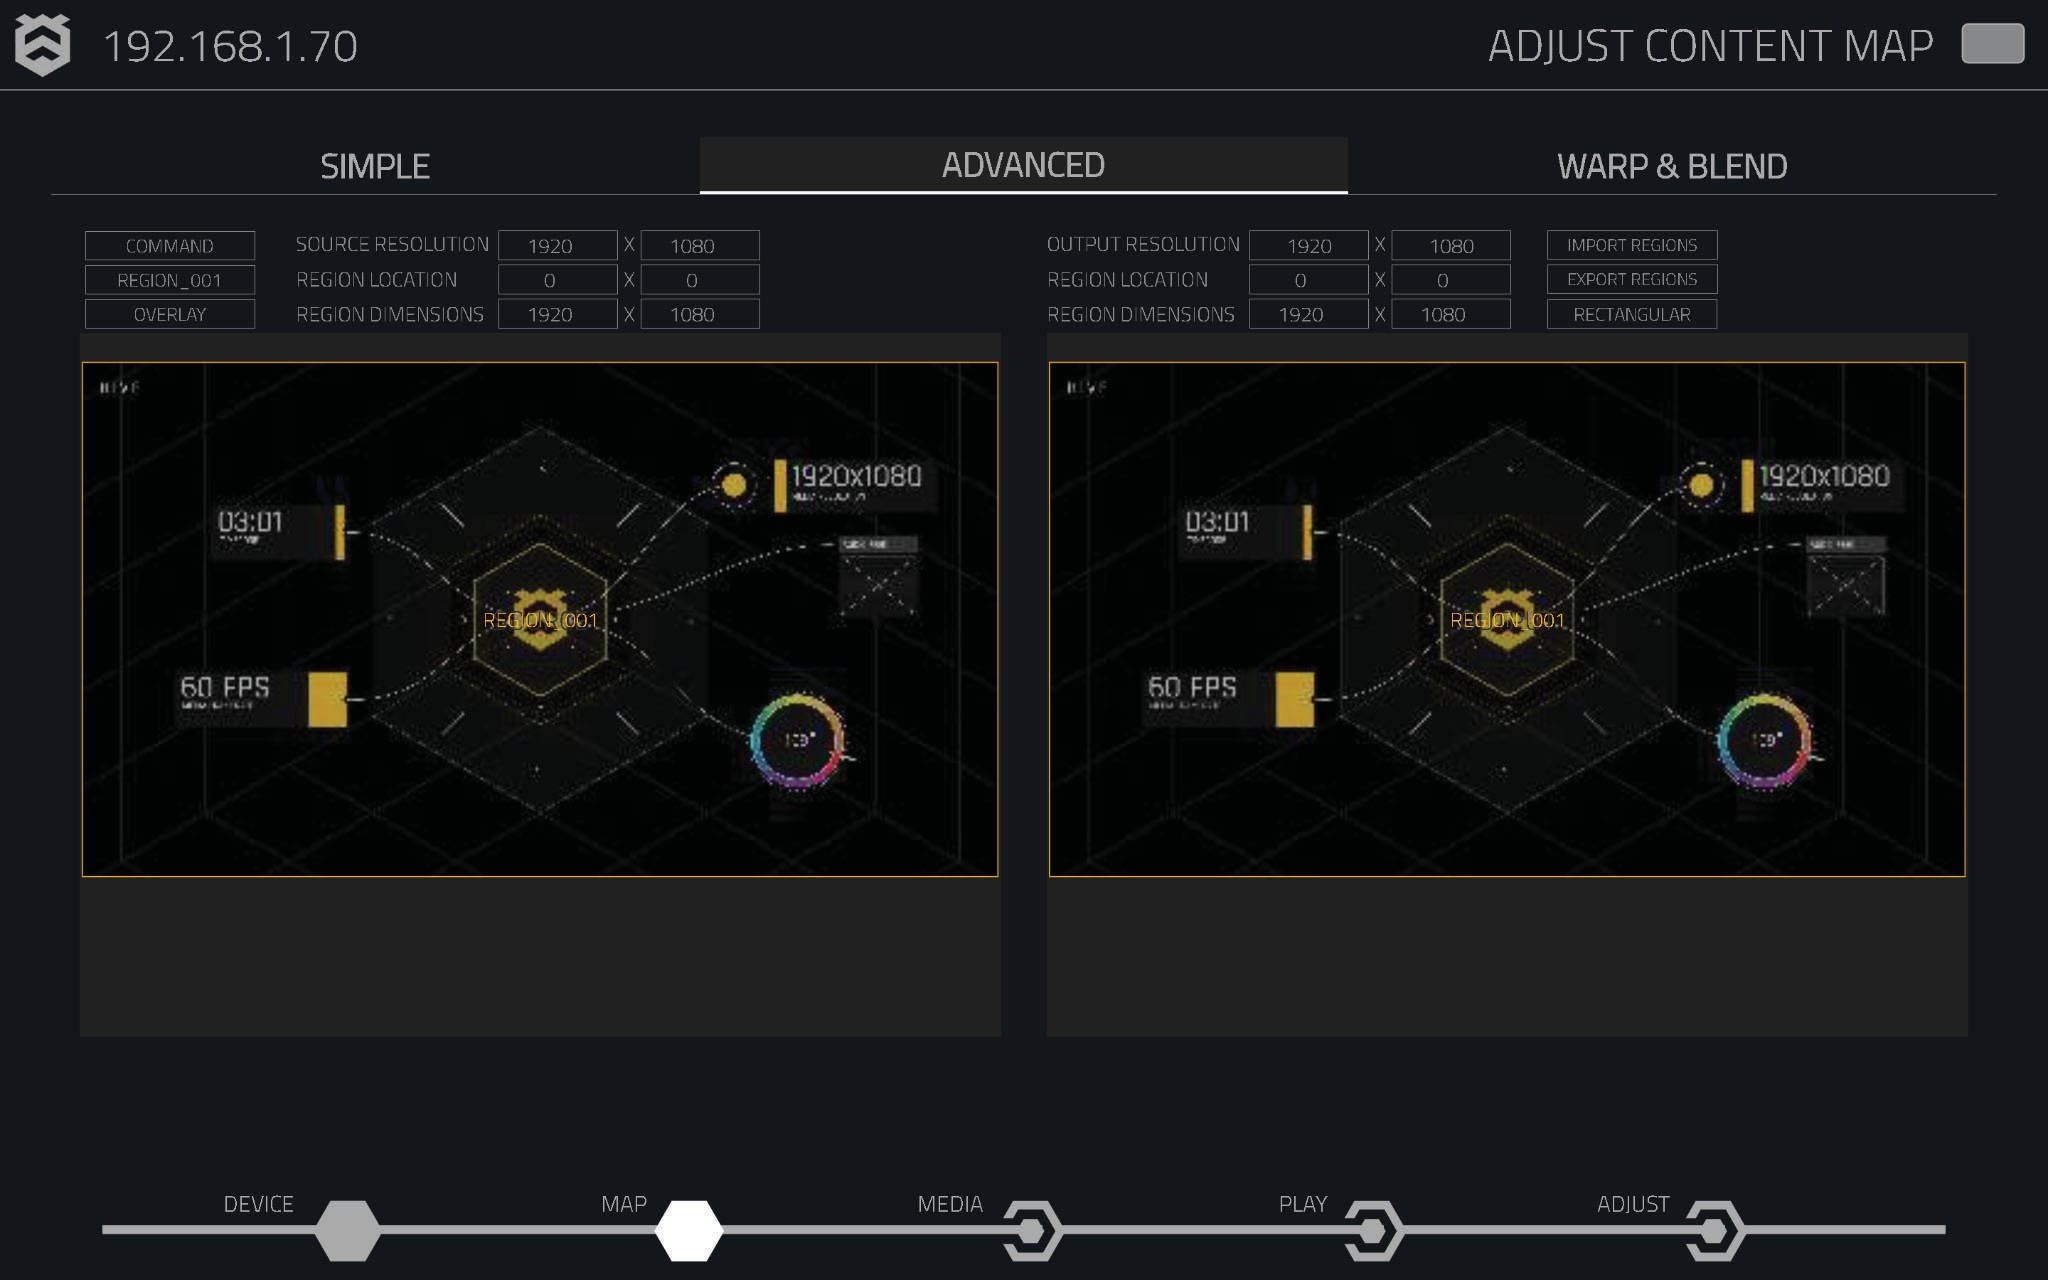
Regions
A region is a defined area within the input raster and output raster. On the Advanced Mapping Page, the left section represents the Source Region, while the right section represents the Output Region. Multiple regions can be created to allow for flexible control.
Source Region
The Source Region defines how the content enters your media pipeline.
Region Types
We support several types of region configurations, allowing flexible control over the mapping process:
- Rectangular Region: Creates a rectangular box that can be resized and repositioned, sampling from the input region and drawing to the output.
- 4-Point Warp: Creates a transformable box within the output region where each corner is movable, allowing for perspective distortion using four points.
- Mask: Produces a 4-point grid overlay for masking the output. The mask shape can be adjusted, for example, to create a circular mask by selecting the appropriate option on the input region side.
- Warp Grids: Allows for manual projection mapping, turning the output into a grid that users can manipulate using different editing modes for fine control.
Learn more about warp grids [here].
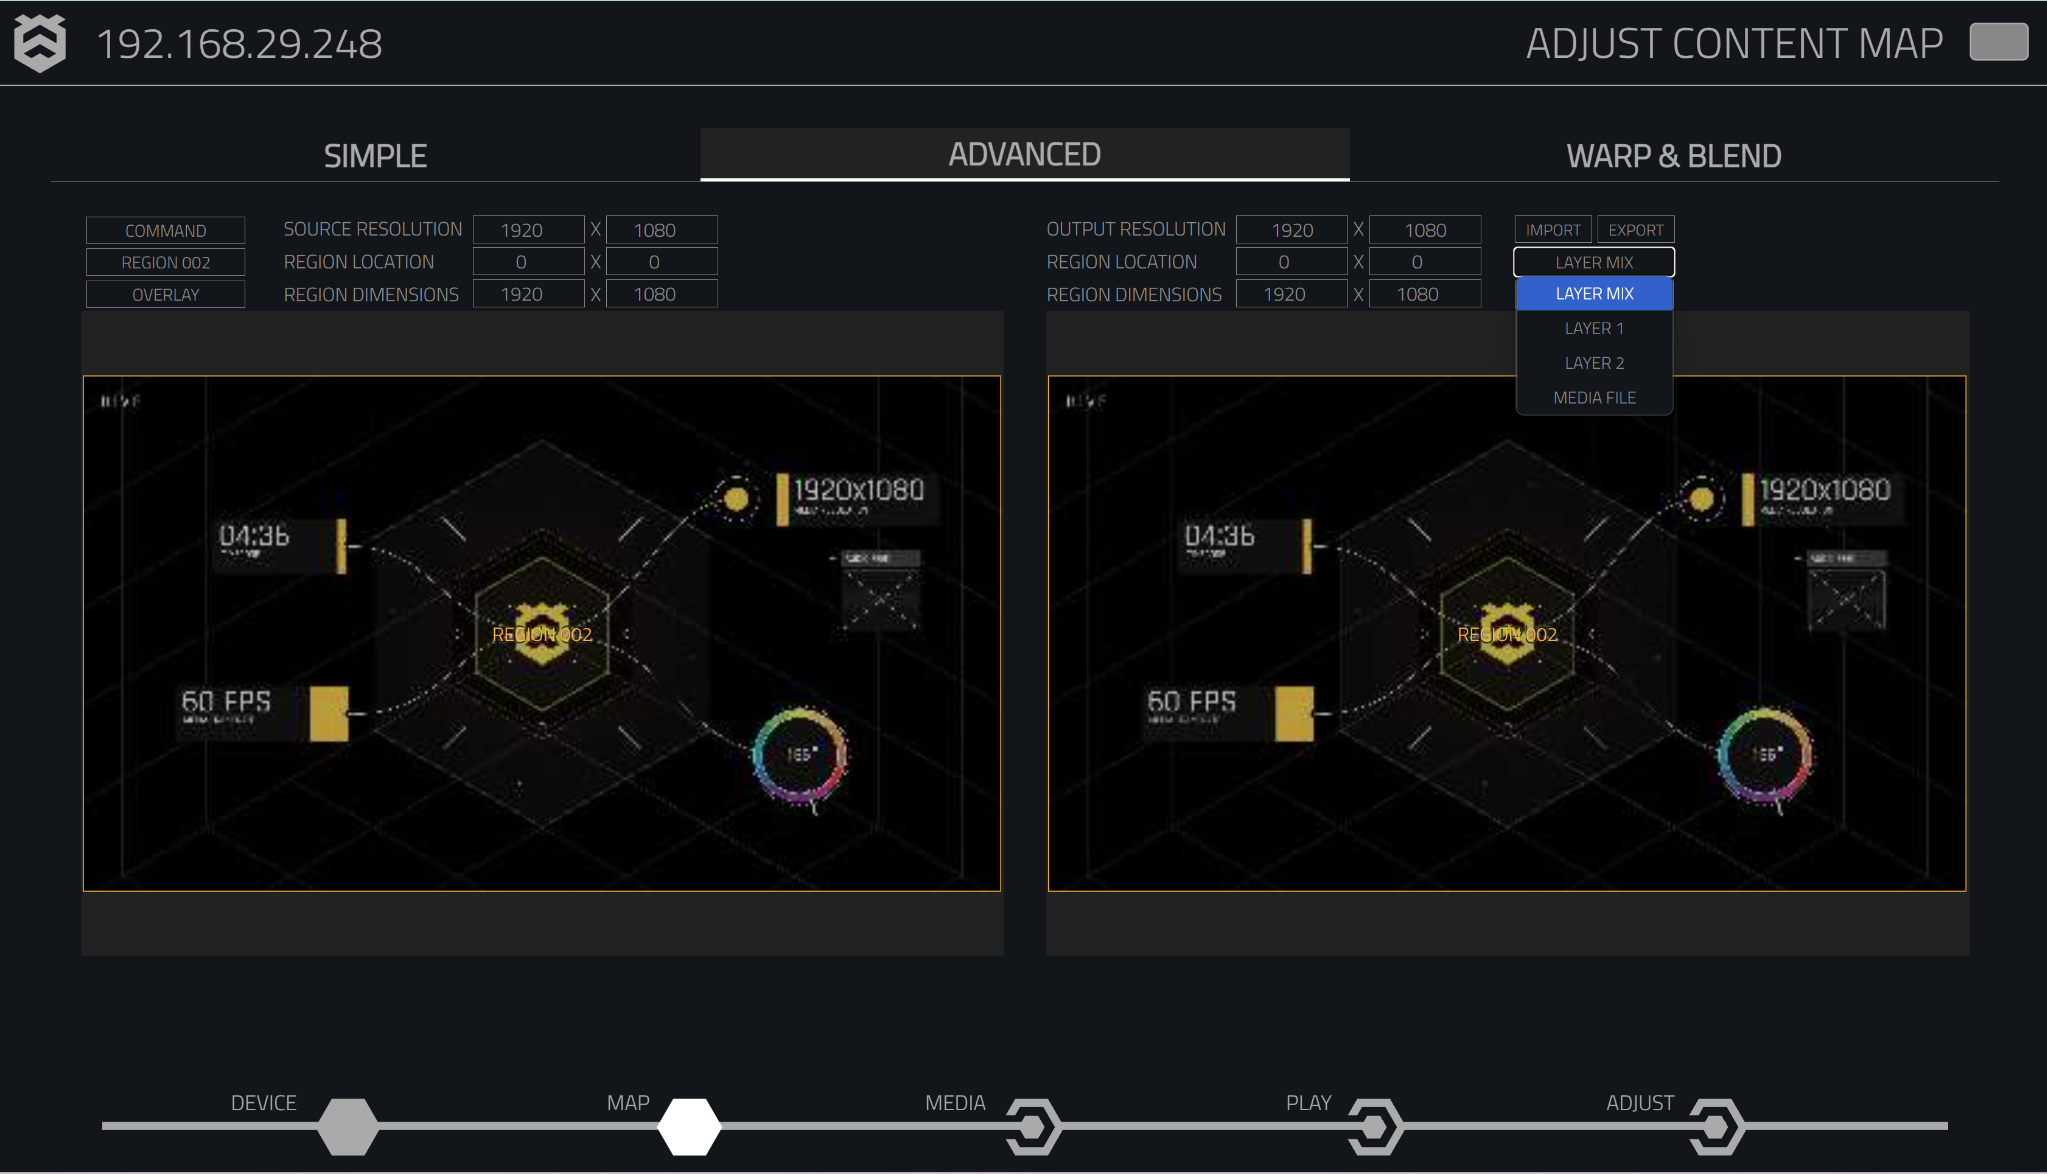
Layer Mix
The Layer Mix feature allows users to control which content layers are active for a selected region. The following options are available:
- Mixed (default): Both Layer 1 and Layer 2 are active for the region.
- Layer 1: Only content from Layer 1 will be displayed in the region.
- Layer 2: Only content from Layer 2 will be displayed in the region.
- Media File: This option prompts the user to select a specific media file to play within the region.
Note: When Media File is selected, the user is unable to make changes from the Parameters page and cannot trigger media remotely to the region.
Blending Options
Choose from several blending options to control how regions are stacked and layered:
- Default Overlay: Stacks regions in the order they were created, with no transparency effects.
- Alpha Transparency: Uses the alpha channel in the media to create transparent areas within the region, allowing for complex layering.
- Additive Mode: Adds pixel values from one region to the region below, creating a cumulative brightness effect where regions overlap.
- Screen Mode: Blends regions based on the luminosity of the content, similar to screen blending effects.
Output Region
The Output Region determines how the content from the Source Region is displayed on the output canvas.
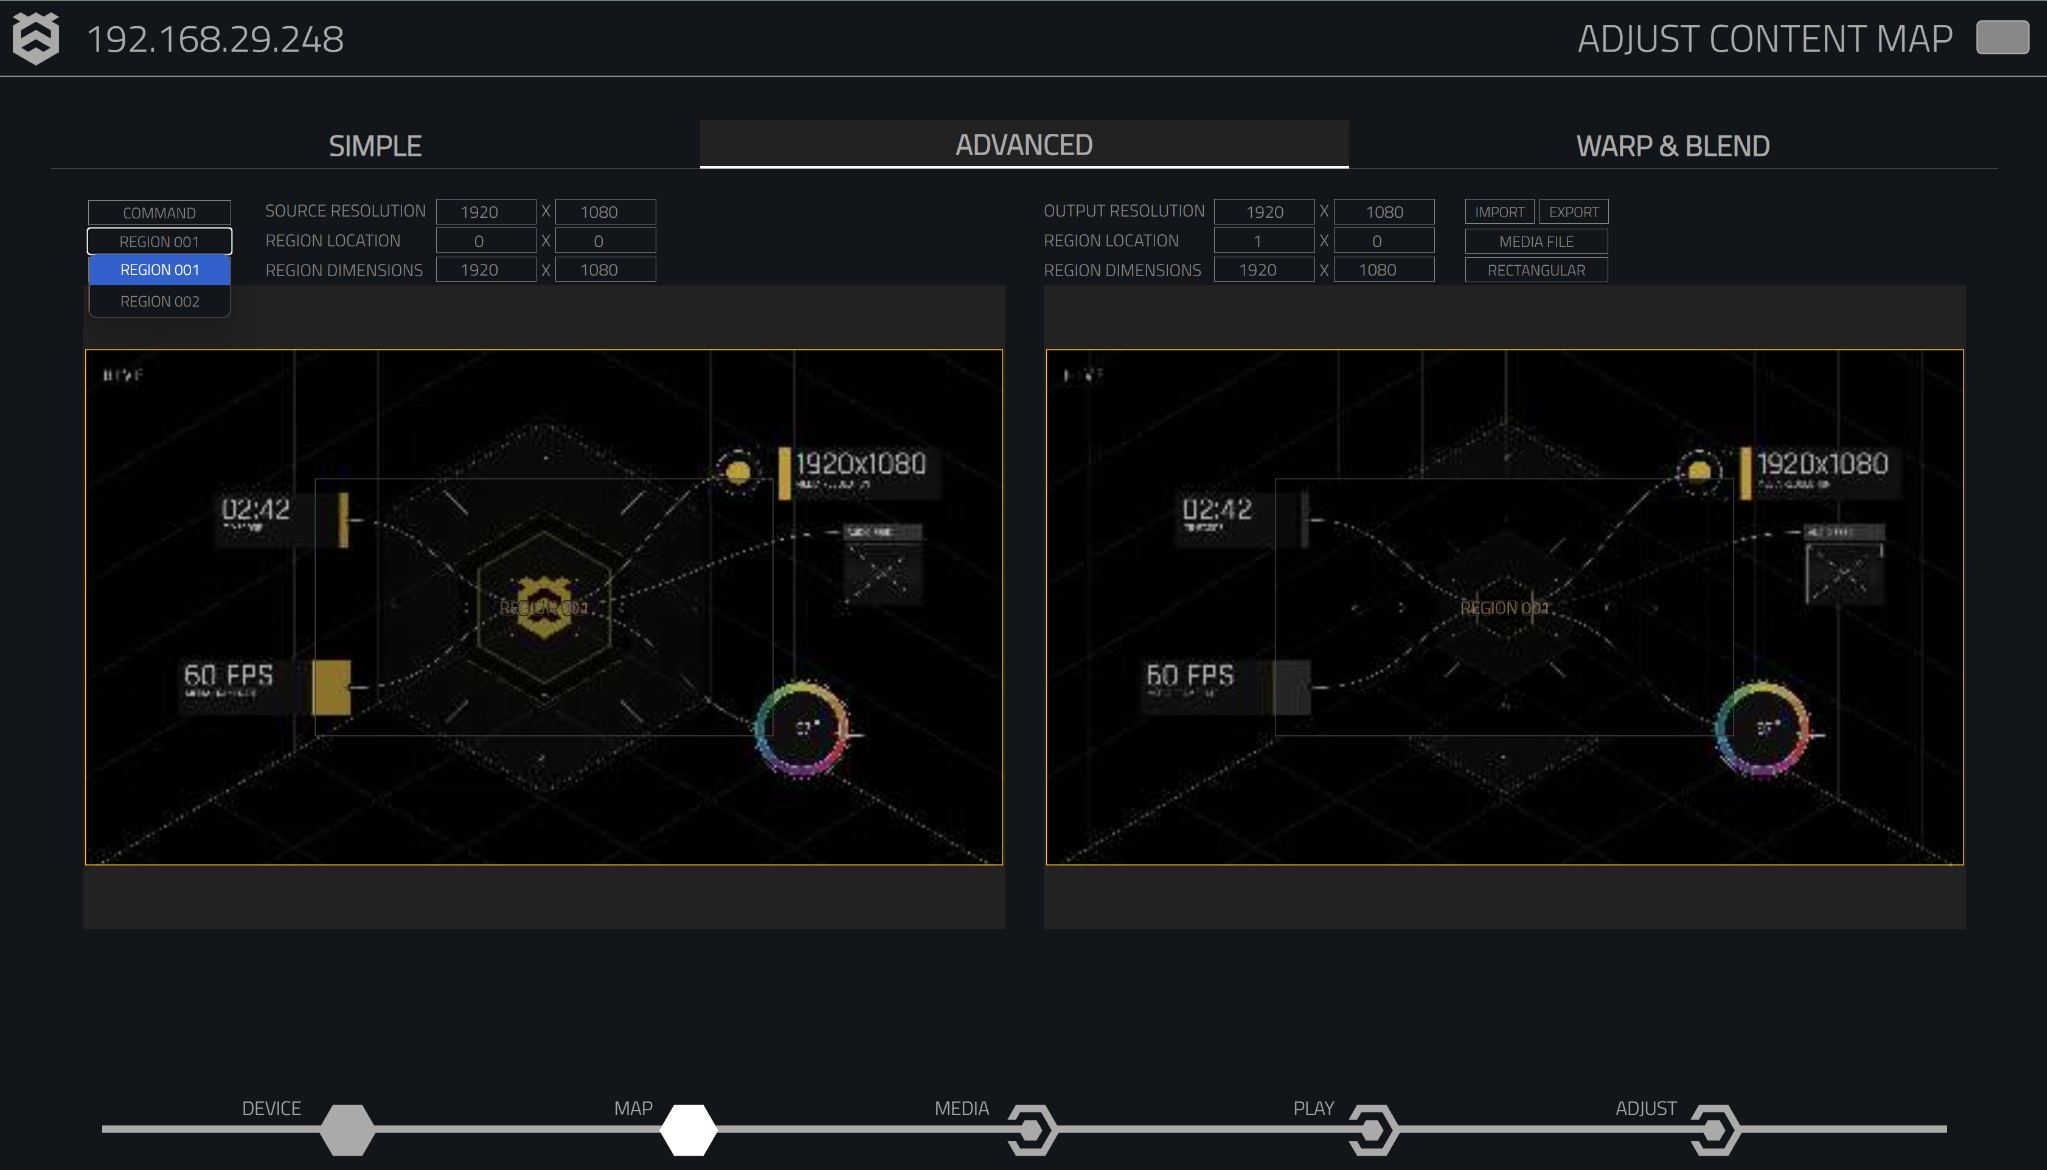
Region Selection Dropdown
When more than one region is created, the region name box on the input side becomes a dropdown selection tool. This allows users to select the region they want to edit.
Command Dropdown
In the Advanced Mapping Tab, users can access the Command Dropdown to manage regions and apply advanced operations. Below is a list of the available commands:
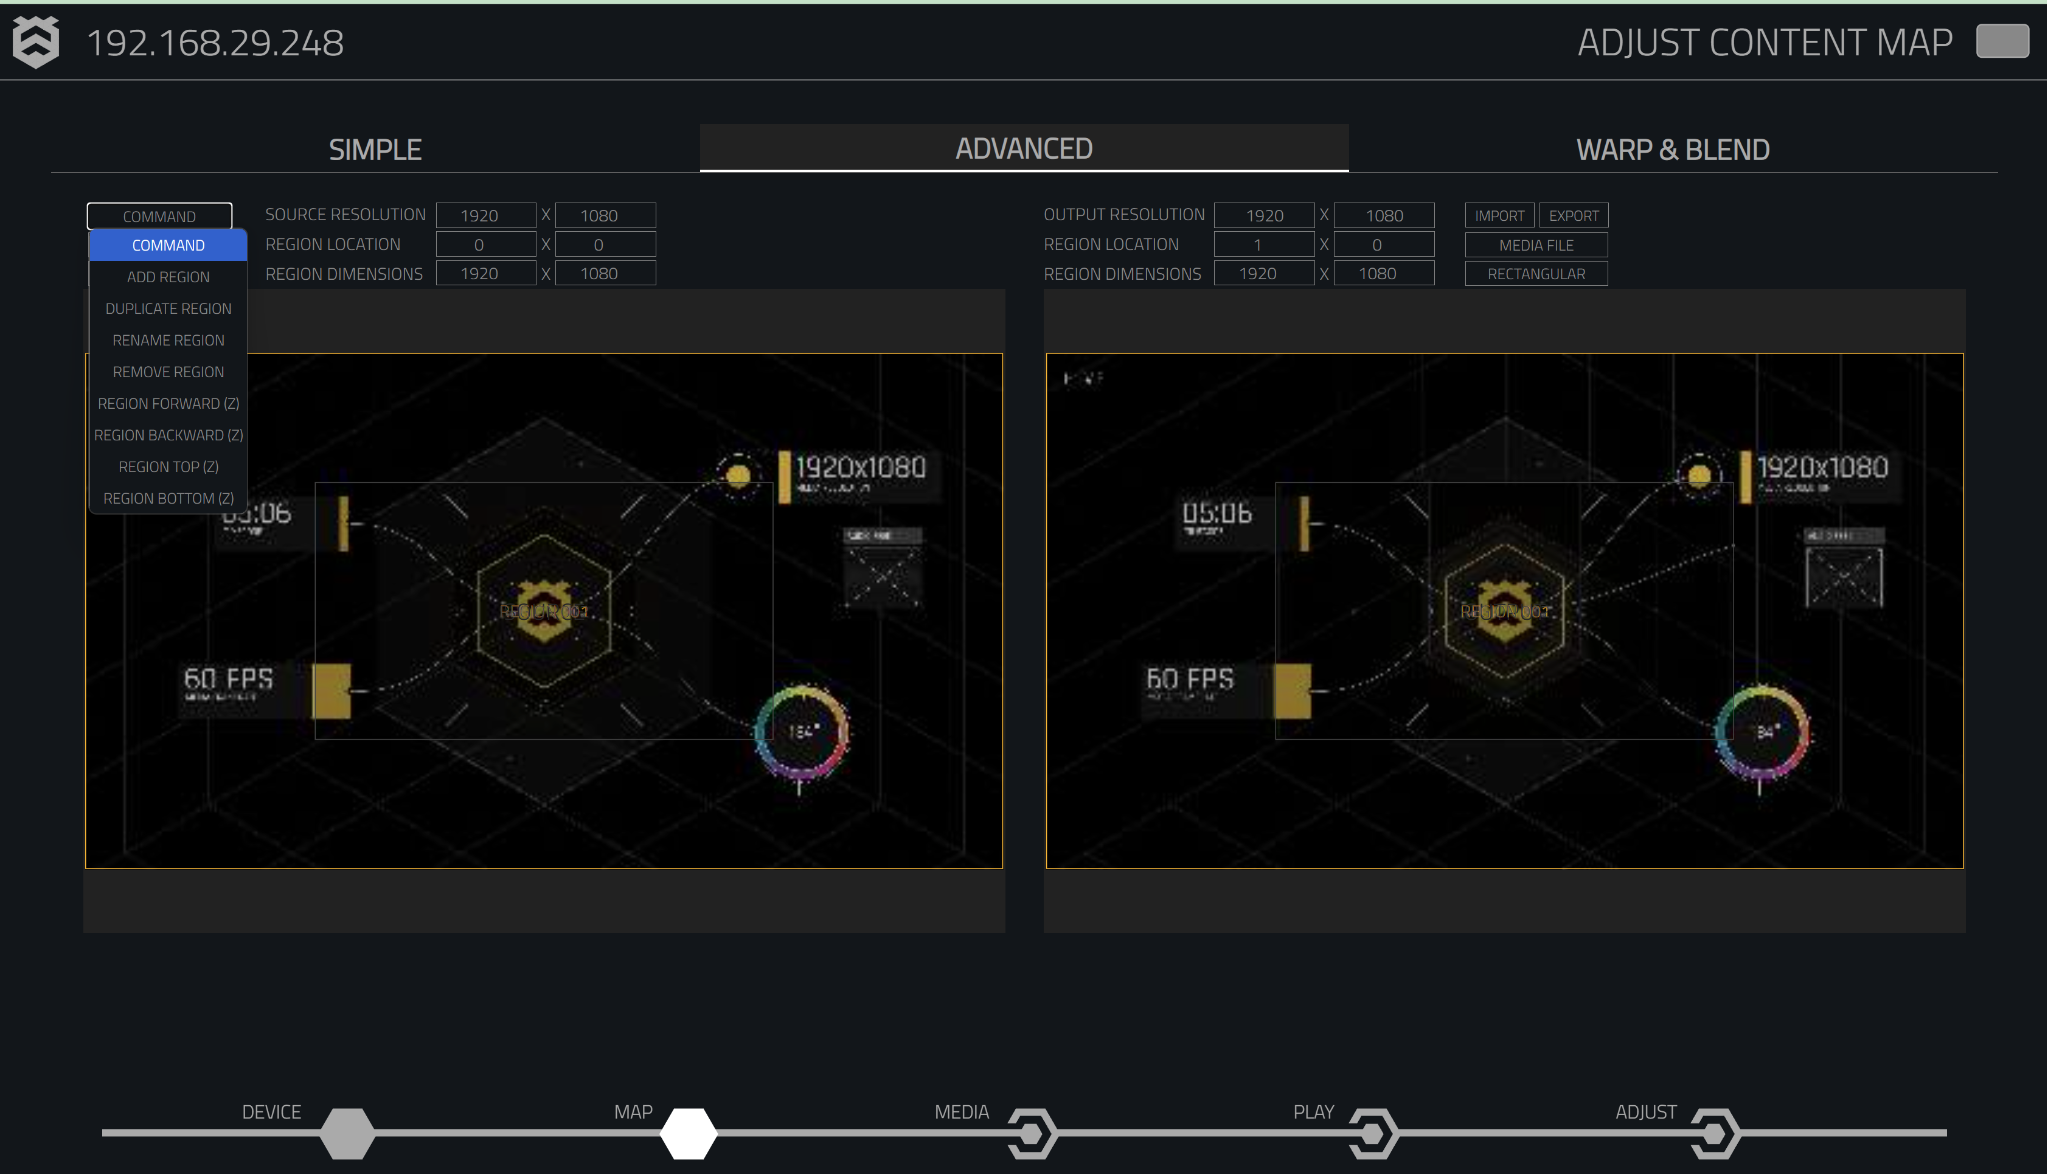
- Add Region: Creates a new input and output region.
- Duplicate Region: Duplicates the selected region, copying both input and output settings.
- Rename Region: Allows users to rename the selected region for better organisation.
- Remove Region: Deletes the selected region from the mapping setup.
- Region Forward (Z): Brings the selected region one level forward, useful for layering content.
- Region Backward (Z): Moves the selected region one level backward in the layer hierarchy.
- Region Top (Z): Moves the selected region to the top of the layer stack.
- Region Bottom (Z): Moves the selected region to the bottom of the layer stack.
These commands allow users to have full control over region management and content layering, making it easy to organise complex media layouts.
Adding and Removing Regions
Adding a Region
To add a new region:
- Select the command button on the input region side.
- Choose Add Region. A new input and output region will be created.
Removing a Region
To remove a region:
- Select the command button.
- Choose Remove Region to delete the selected region.
Importing and Exporting Regions
Hive players use JSON files for importing and exporting regions, allowing users to efficiently manage and replicate mapping configurations.
Importing Regions
To import region settings:
- Navigate to the right-hand side of the Advanced Mapping Page and click the Import button.
- Select and upload a JSON file with the saved region mapping. This is particularly useful for automating the mapping process or integrating pre-configured settings from other systems.
Exporting Regions
To export region settings:
- Click the Export button, located next to the Import option.
- Save the current region mapping as a JSON file, allowing for easy reuse and replication across different setups or installations.
Once the region mapping has been customised, users can export the setup for quick deployment or as a backup.